On this page
Networks & the internet
A group chat run by a company routes every message through that company's servers. Even when the contents are encrypted, the company can see who is talking to whom, and how often. In this module, you will build your own private server.
The server is a Raspberry Pi 5, a single-board computer.1 It runs the team's chat server and a network-wide ad and tracker filter, reachable only over a private VPN. The build has three parts: a phone (hardened in Module 00, running Element), the laptop you work from, and the Pi. The phone and laptop are clients; the Pi is the server they connect to.2
A network is a group of devices that can reach each other. The devices behind your router (your laptop, phone, and Pi) form your local network, or LAN.3 Everything past the router is the internet. The router is the gateway between them: every connection in or out passes through it.4 The router uses network address translation, or NAT: on the way out, it rewrites your devices' private addresses to its one public address and tracks each outbound connection. Inbound packets that match an existing connection are forwarded, and all others are dropped.5
Two devices on the same LAN exchange traffic directly without leaving the subnet; it never crosses the WAN port. Traffic to an outside address is forwarded out through the router's WAN port and the response comes back through the same NAT entry. The Pi's services bind to LAN or VPN addresses only, so no inbound NAT entry exists for them on the public internet.
Addresses & names
Every device on a network has an IP address, a number that says where it is, like 192.168.8.152. Addresses that begin 192.168, 10., or 172.16 through 172.31 are private: they work only inside your own network. The public internet has no route to a private address, so nothing outside can reach your Pi by it.5 Your network's one public address, the one the internet sees, belongs to the router.
Numbers are hard to remember, so names stand in for them. DNS (the Domain Name System) is the lookup that turns a name into an IP address.34 Names ending in .local, like techno-guerrilla.local, are resolved on your own network by mDNS (multicast DNS), which the Pi answers through the Avahi service.6
Reaching it securely
SSH (Secure Shell) is the encrypted command-line connection you run the server over. It authenticates with a key pair: the private key stays on your laptop and is never transmitted; the matching public key on the Pi verifies each login.7
Scanners continuously probe port 22 and attempt credential logins using wordlists of common and default passwords.8 Setting PasswordAuthentication no in sshd causes the server to reject the authentication method entirely before any credential is checked; public-key authentication requires the client to prove possession of the private key through a cryptographic challenge, which wordlists cannot satisfy.7
A server runs many services at once, so each one listens on a numbered port (SSH listens on port 22). A firewall decides which ports outside traffic can reach. Set to default-deny, every port is closed until you open it; you open only what you need, and only to the people you trust.10
Each device runs a WireGuard client that connects to a central coordinator (Headscale) and receives a private 100.x address. The Pi binds its services to that address only, so they are unreachable from any interface that is not the VPN tunnel. Enrollment controls which machines get a 100.x address; it does not authenticate users on those machines. The coordinator itself is a public-facing server and must be hardened: SSH key-only on port 22, default-deny firewall, ports 80 and 443 open for the HTTPS endpoint the VPN clients dial.
A hosted provider can be compelled to hand over your records: Swiss authorities made ProtonMail log and hand over an activist's IP address (2021).9 Headscale runs on a VPS you control, so there is no third party to compel; Unit 15 takes this argument up in full.
Identify your hardware
The server is a Raspberry Pi 5 (8GB RAM, BCM2712 quad-core Cortex-A76 at 2.4 GHz).1 Storage is a 512GB NVMe SSD on a PCIe M.2 HAT; the official Raspberry Pi SSD Kit includes the M.2 HAT+, the drive, and the mounting hardware.11 A microSD card is used only for the initial flash and first-boot configuration; once the system is cloned to the SSD in Unit 12, the card comes out. The Active Cooler mounts directly to the SoC and keeps the processor below thermal-throttle temperature under continuous load.12 The official 27W USB-C PSU supplies enough current for both the board and the SSD on the HAT.13
A GL.iNet Slate AX (GL-AXT1800) provides the LAN: dual-band Wi-Fi 6, a gigabit WAN port, and an OpenWrt-based admin panel at 192.168.8.1.14 All SSH and configuration work in this module runs from the laptop hardened in Module 00. The Headscale coordinator requires a public IP, so it runs on a rented VPS with a domain name pointed at it, not on the Pi, which sits behind NAT.15 Unit 14 covers the VPS setup.
Open your terminal
A terminal is a window where you type commands instead of clicking, and the program that reads them is the shell. Every command in this module runs on the Pi, which is Linux, so the commands are the same whatever laptop you connect from. Only how you open a terminal and connect differs.
macOS: open Terminal from Applications, then Utilities (shell is zsh; the SSH client is already installed). Linux: open your terminal app, often Ctrl+Alt+T (shell is usually bash; the SSH client is installed). Windows: open Windows Terminal or PowerShell. On Windows 10 (1809 and later) and 11 the built-in OpenSSH client is the SSH tool; it ships as an optional feature, and if ssh is not found you add it under Settings, Optional features, with no PuTTY needed.16
Run this on any OS; it prints the client version:
$ ssh -VOpenSSH_9.9p2, LibreSSL 3.3.6
# Linux prints an OpenSSH + OpenSSL line; Windows prints its own OpenSSH version. The number varies by system.Install the imager
Raspberry Pi Imager is the official program that writes the operating system to the microSD card. It runs on macOS, Windows, and Linux, and the current release is the version 2 series.17 Download it from the Raspberry Pi site and install it.
Flash the OS
Imager walks the setup in order: device, operating system, storage, then the customisation screens. The screen record below shows each screen as you fill it in. One choice matters up front: Raspberry Pi OS Lite (64-bit). Lite omits the desktop environment, browser, and their dependencies. The package footprint and attack surface are smaller than the full image.
The customisation screens write a firstrun.sh script to the card; the Pi runs it on first boot to apply your hostname, user account, and SSH key before the system comes up. Two fields are critical: set your own username and password (Raspberry Pi OS removed the default pi/raspberry account;18 Imager no longer creates one unless you specify it), and under Remote access enable SSH and paste your laptop's public key from ~/.ssh/id_ed25519.pub (from Module 00, or generate it in Unit 9). The public key is safe to paste; never paste the private key. Save, then write the card.
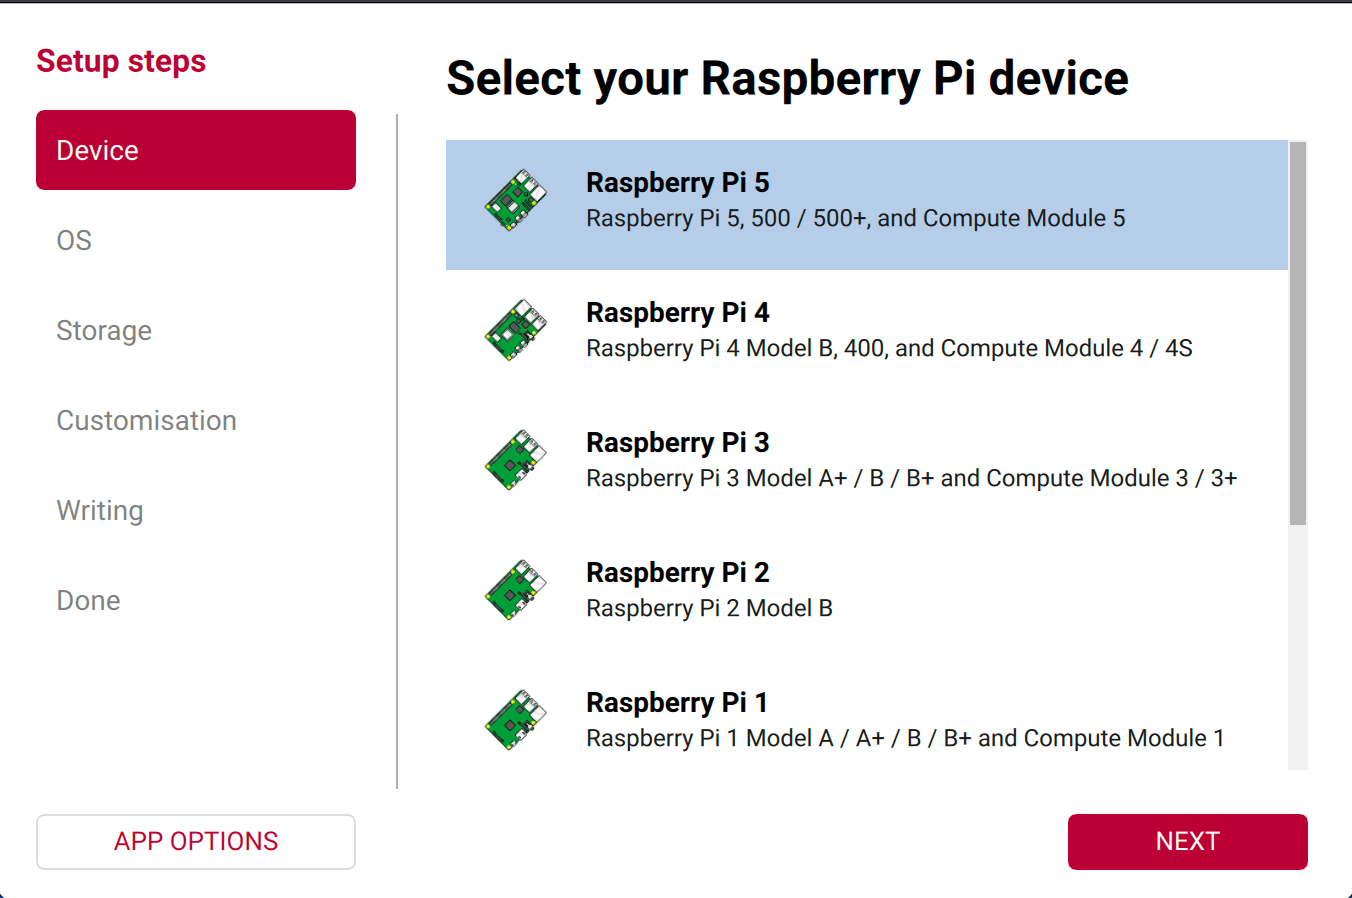
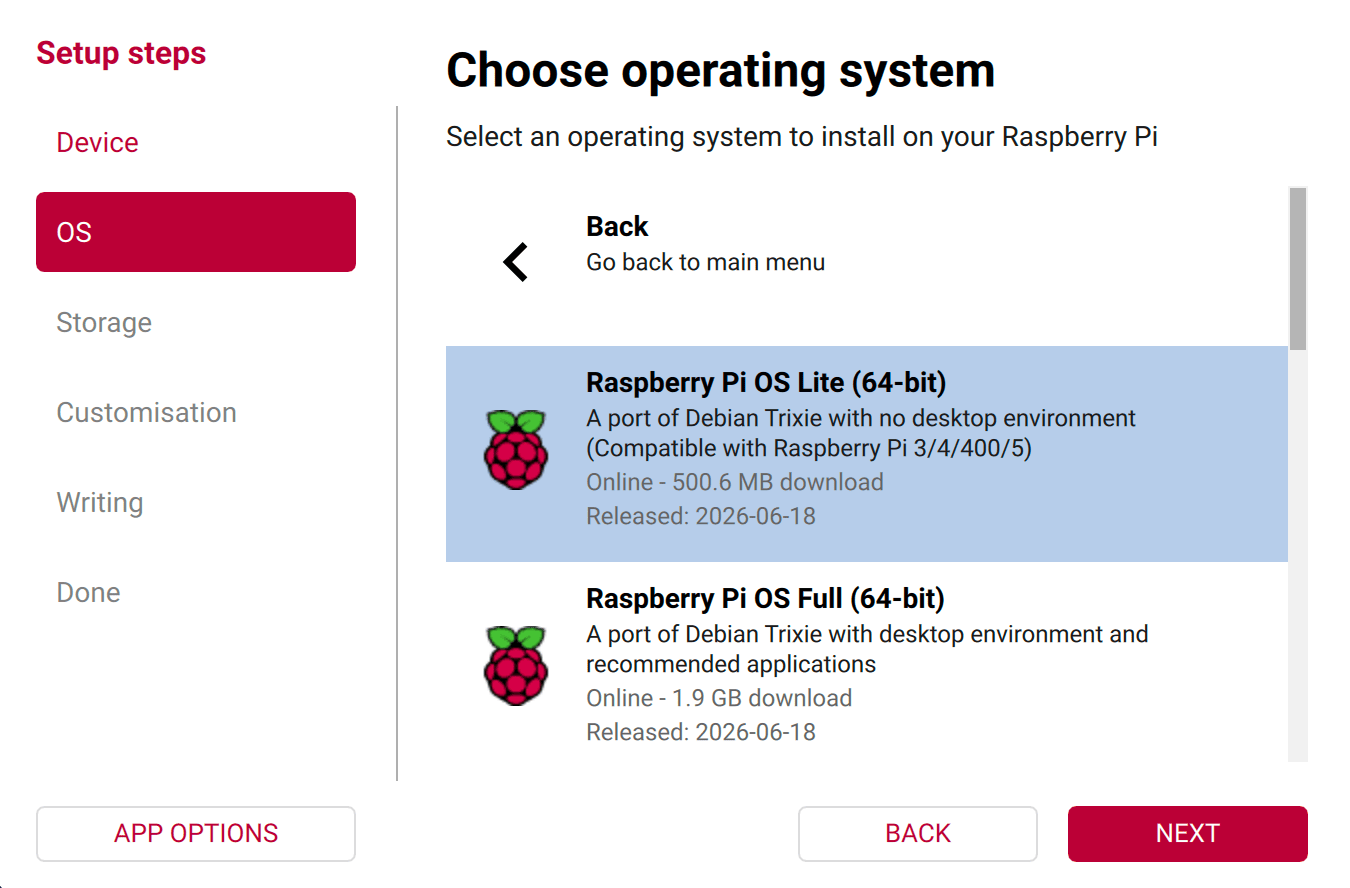
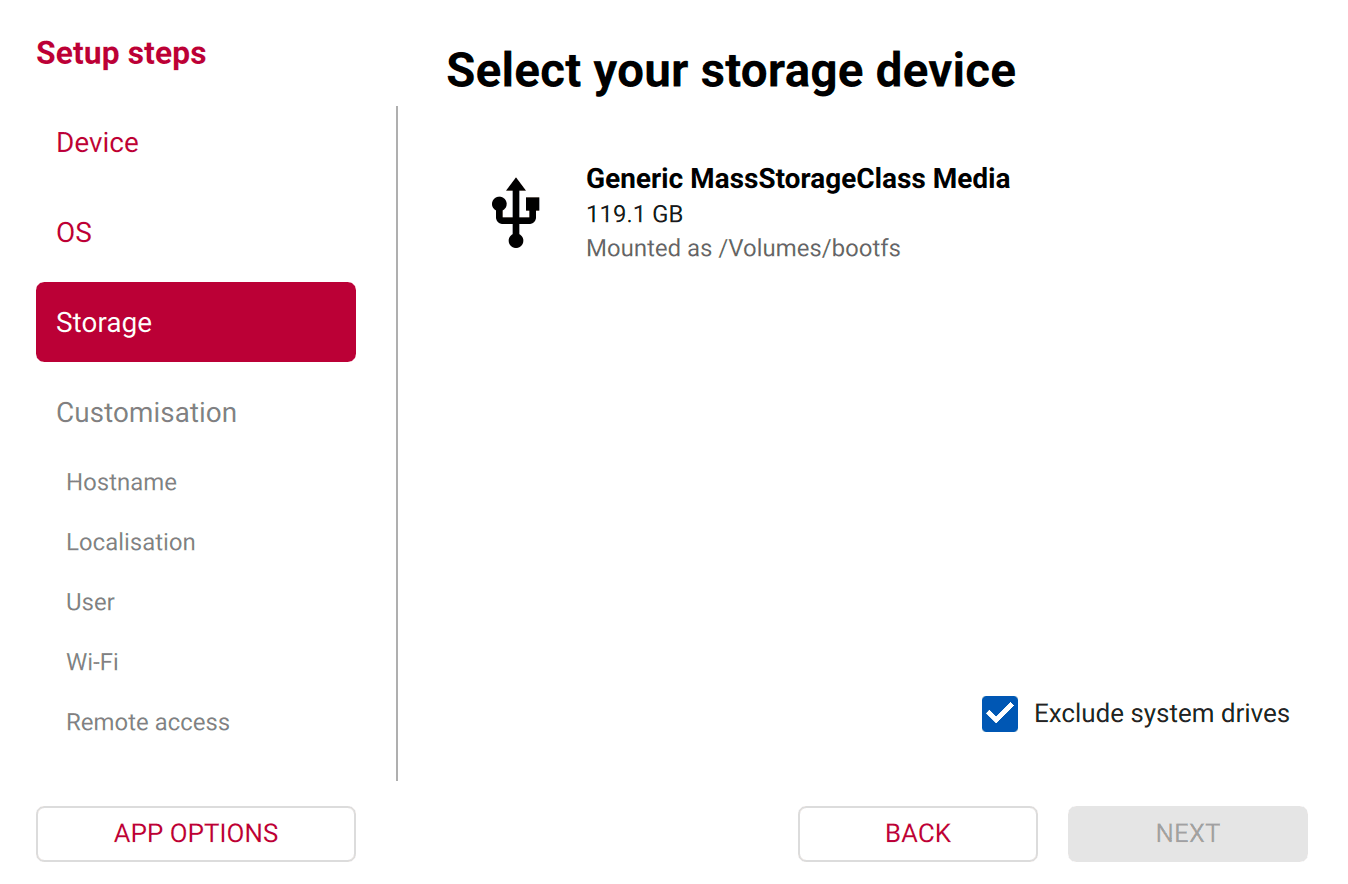
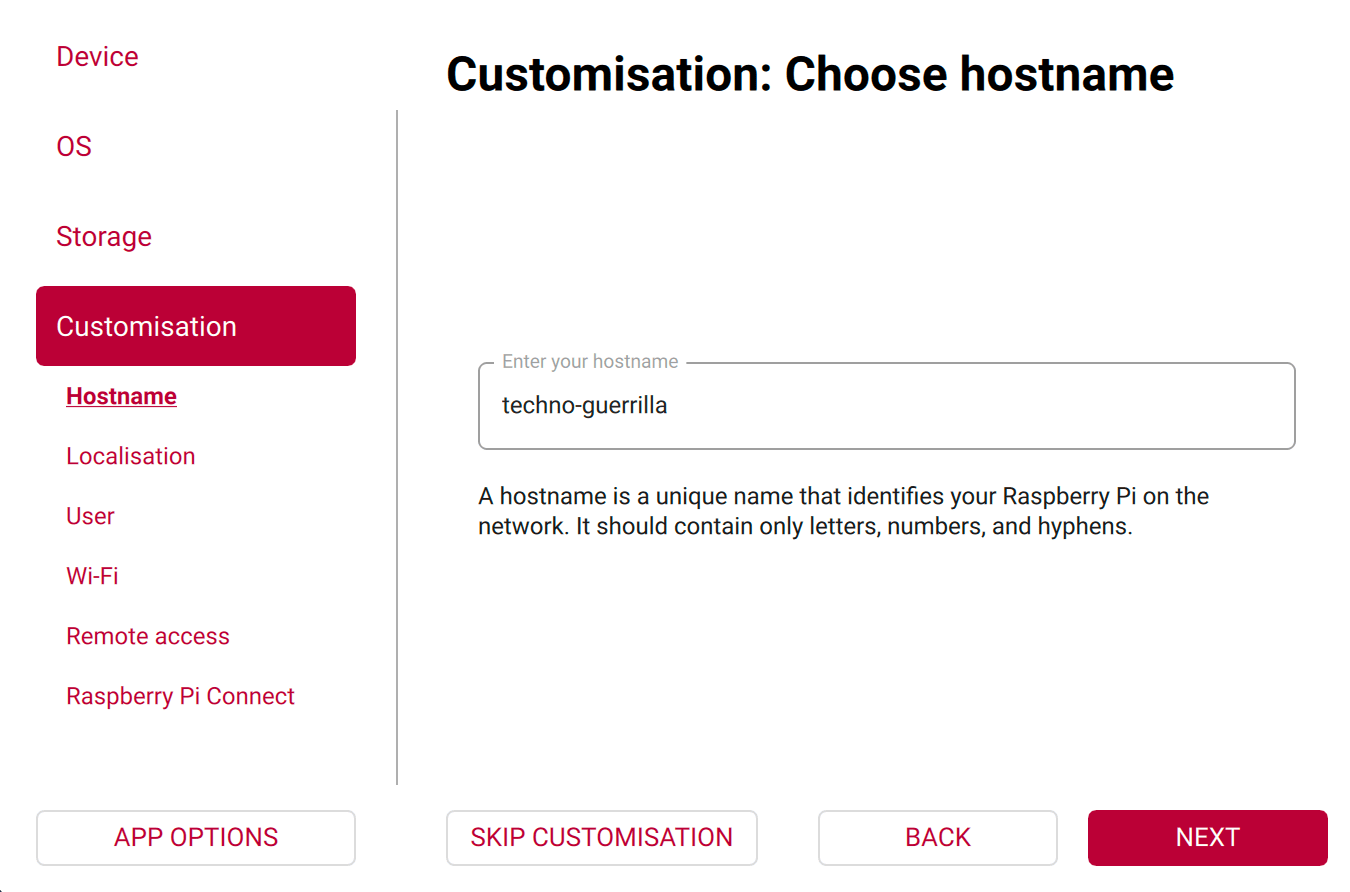
techno-guerrilla, so every command you type matches the module's examples. You can set any hostname you want on your own build; if you change it, replace techno-guerrilla with yours wherever it appears.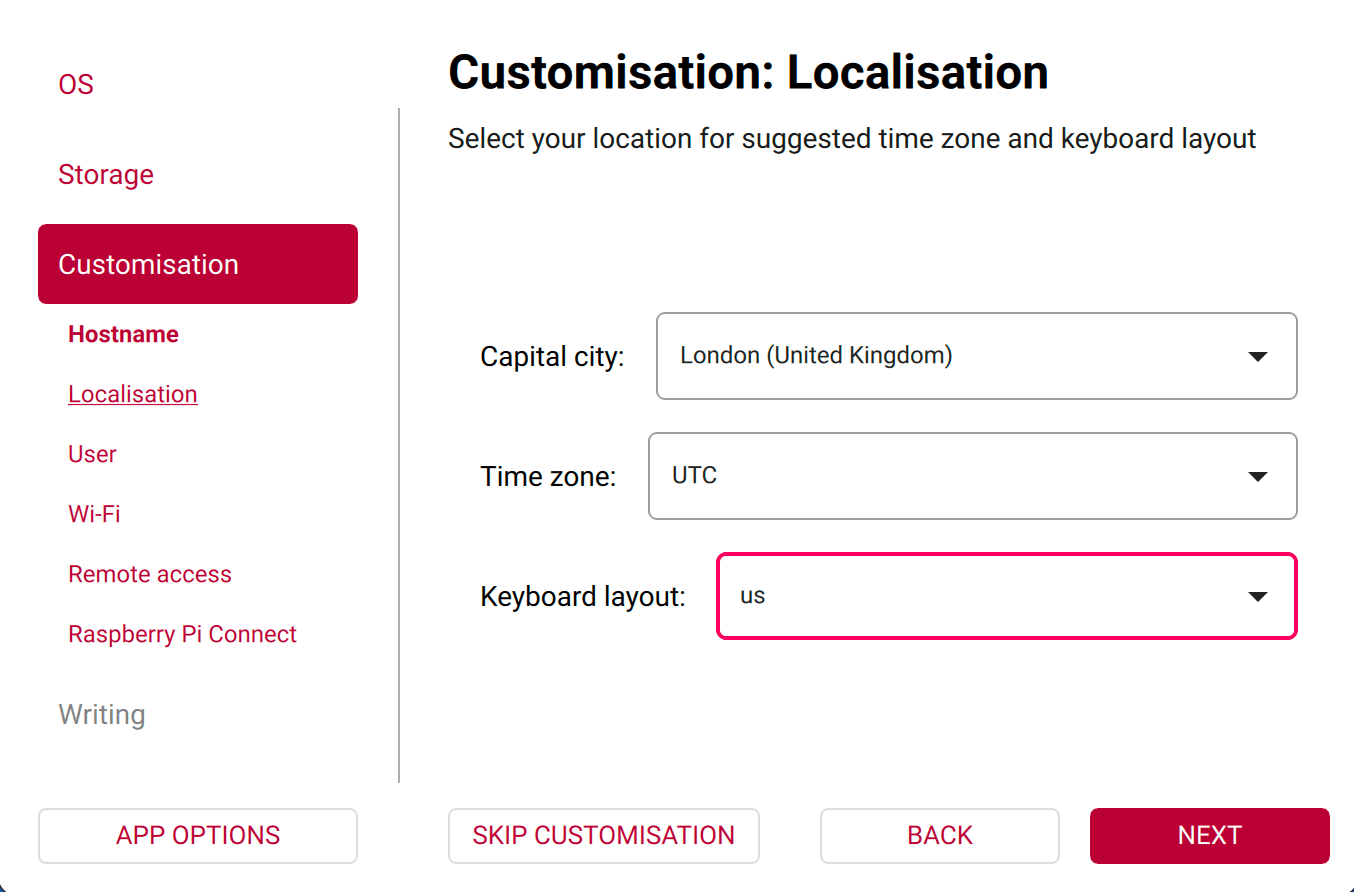
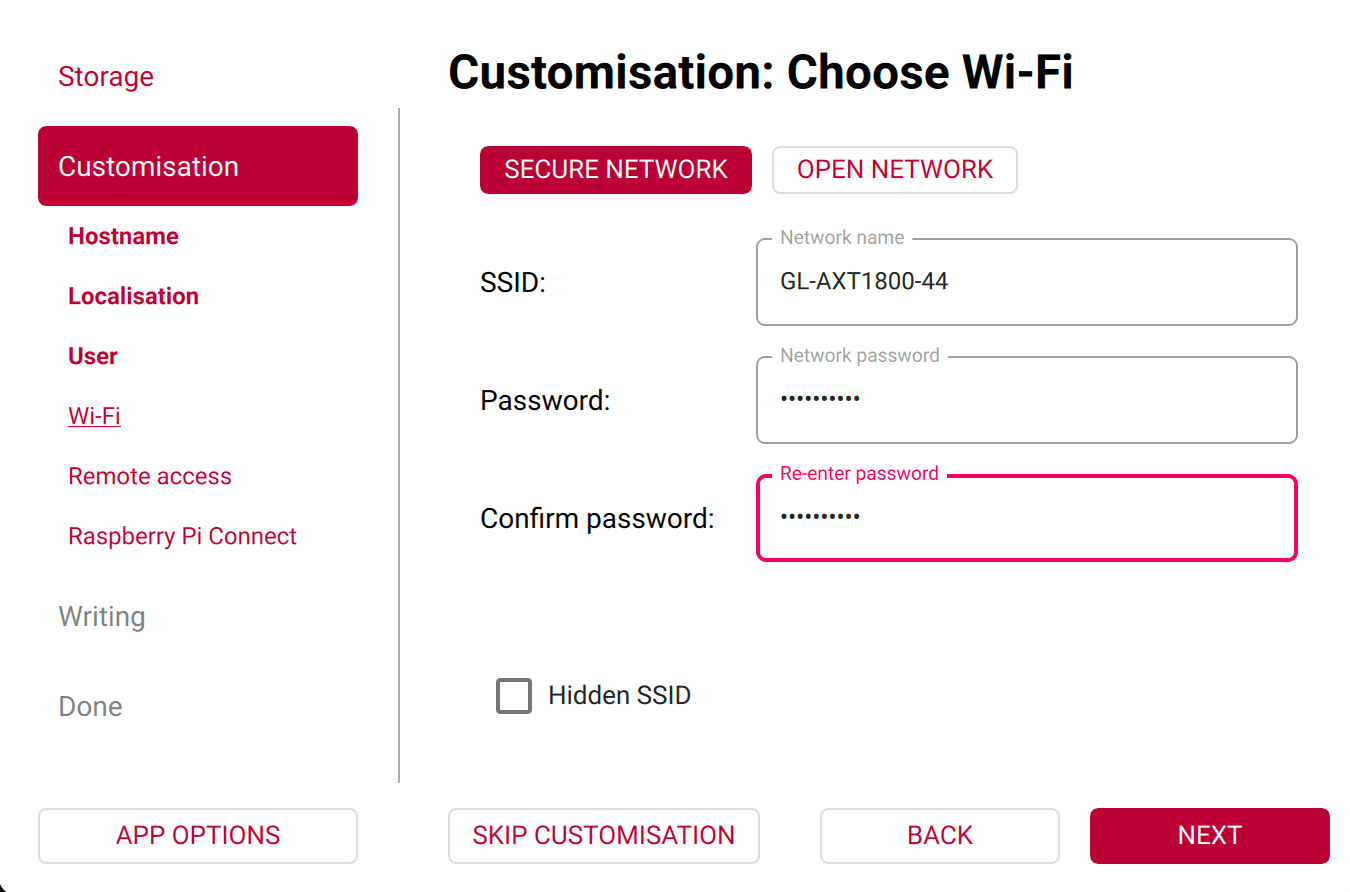
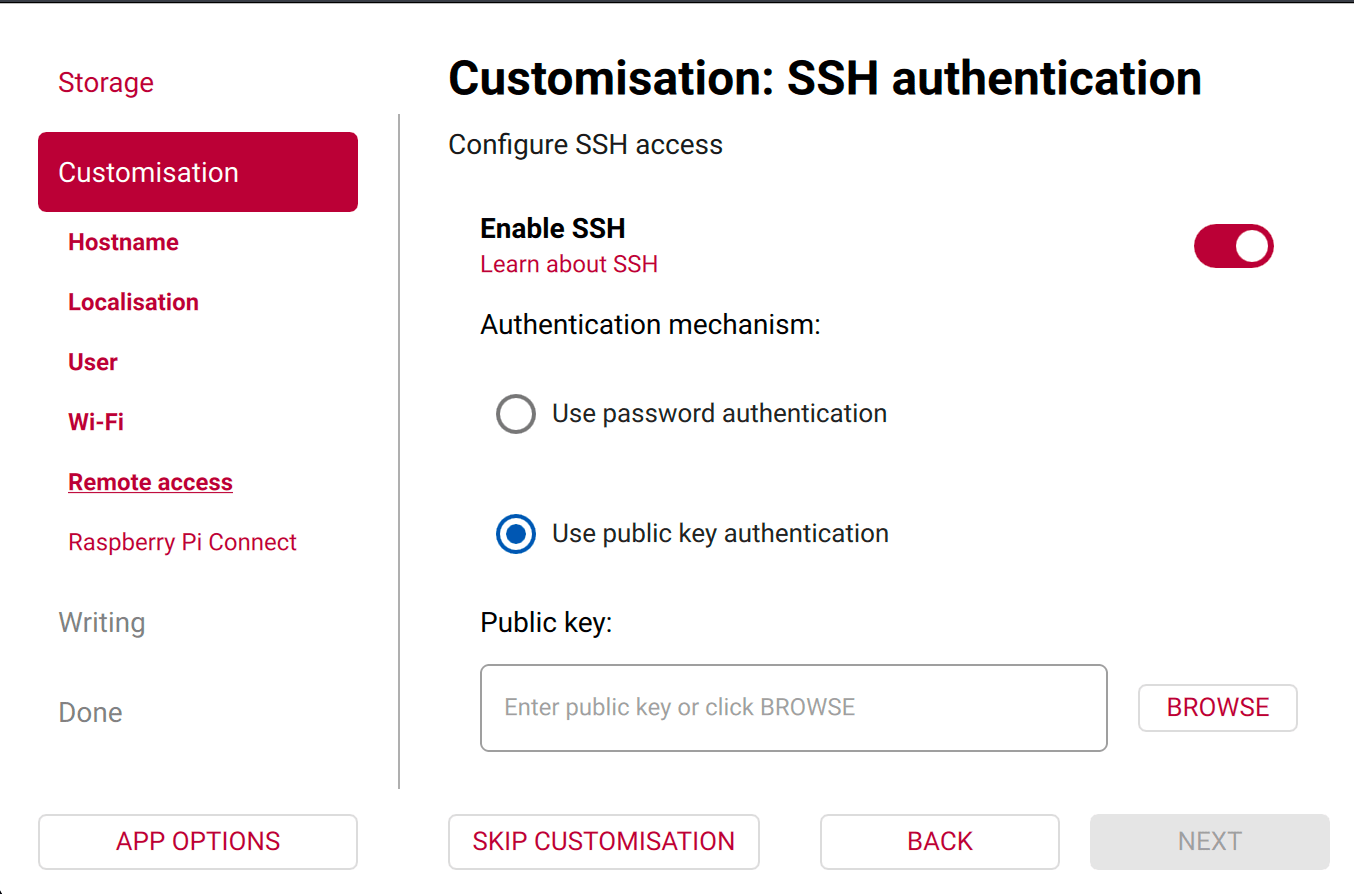
~/.ssh/id_ed25519.pub.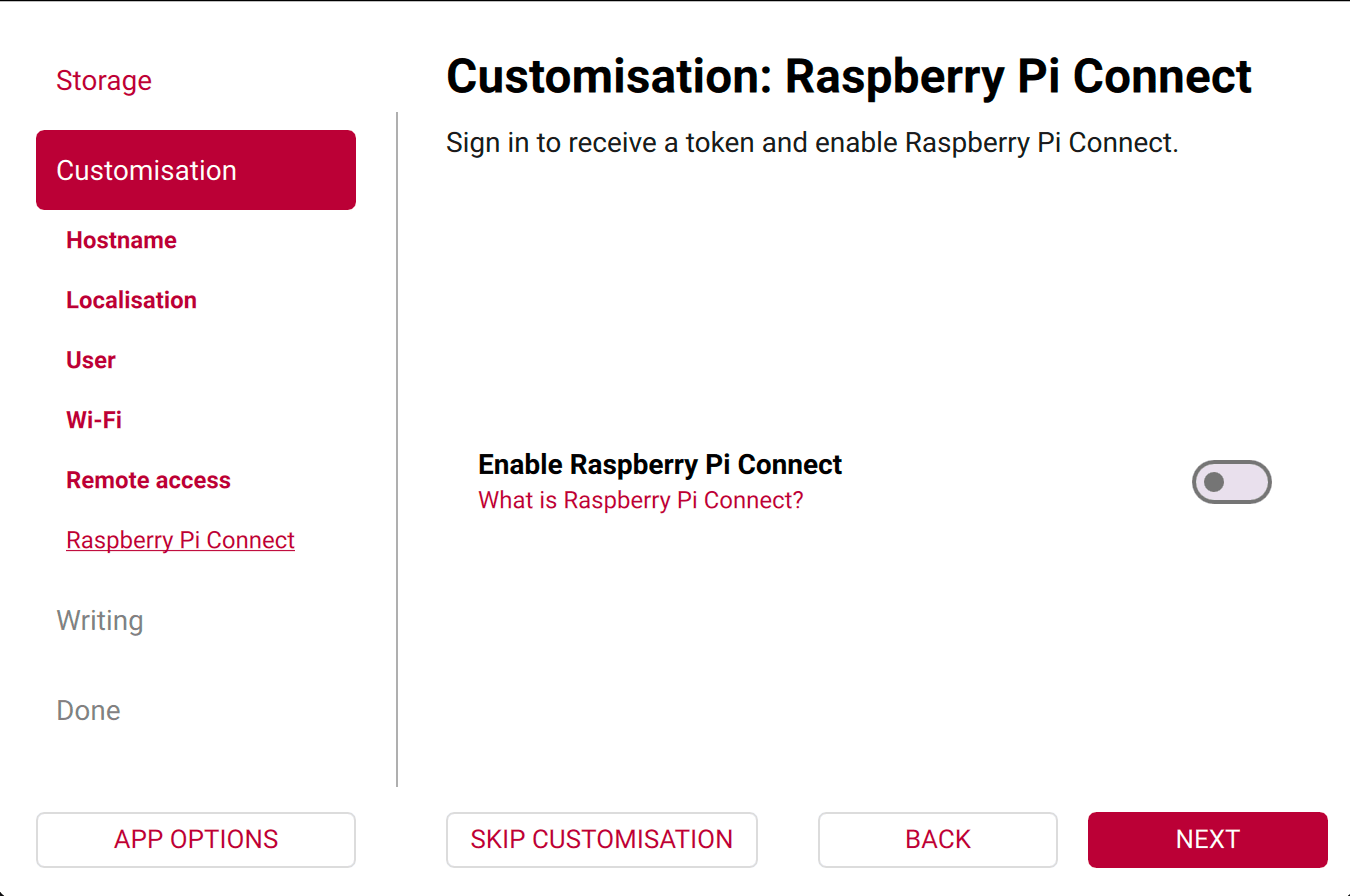
Assemble & power on
Insert the microSD card from Unit 07, connect an Ethernet cable from the Pi to the GL.iNet router, then connect the 27W USB-C supply. Power is last because the Pi boots the moment it arrives and runs the first-boot configuration script from the card. Leave the NVMe SSD and M.2 HAT aside until Unit 12. A drive that already holds an OS can take over the boot sequence before the card gets a chance, leaving the Pi unreachable. The onboard button does a clean shutdown; press it again to power back on.
Reach it over SSH
The router gave the Pi a private address like 192.168.8.152, and it answers to techno-guerrilla.local, so you reach it by name. The public key is already on the Pi from flashing the card; the private key is on your laptop. If you do not have one yet, make a key pair:
$ ssh-keygen -t ed25519 -C "laptop-to-node"Set a passphrase when it asks. It encrypts the private key on disk, so a copied key file is useless without it.
$ ssh [email protected]
The authenticity of host 'techno-guerrilla.local (192.168.8.152)' can't be established.
ED25519 key fingerprint is SHA256:<your Pi's fingerprint>.
Are you sure you want to continue connecting (yes/no/[fingerprint])? yes
Warning: Permanently added 'techno-guerrilla.local' (ED25519) to the list of known hosts.
Linux techno-guerrilla 6.18.34+rpt-rpi-2712 #1 SMP PREEMPT Debian 1:6.18.34-1+rpt1 (2026-06-09) aarch64 GNU/Linux
techno-guerrilla $ whoami
user
techno-guerrilla $ hostname
techno-guerrilla
techno-guerrilla $ whoami    # your user
techno-guerrilla $ hostname  # techno-guerrilla
Before changing anything, update the system. Use full-upgrade, not plain upgrade, so firmware and kernel updates can pull in what they need.19
techno-guerrilla $ sudo apt update && sudo apt full-upgrade -yThe rehearsal has you connect, update the Pi, and set the firewall, typing each real command yourself. It walks you through the common mistakes, including the firewall step that locks most people out of a remote machine, so you make them here instead of on the Pi.
Interactive Reach & secure the Pi Rehearses the commands you run on a real Pi, with responses representative of what each one prints. Open it full screen →Connection refused usually means the Pi has not finished its first boot; wait a minute and retry. Could not resolve hostname techno-guerrilla.local means your network is not resolving .local names; find the Pi's address in the router's list of connected devices and use that instead. Permission denied (publickey) means the wrong key is being offered; point at the right one with ssh -i ~/.ssh/id_ed25519 [email protected]. After a re-flash, REMOTE HOST IDENTIFICATION HAS CHANGED means the Pi has a new key; clear the old entry with ssh-keygen -R techno-guerrilla.local.
Just-enough Linux
Every command in this module runs in a Linux shell over SSH. If you have not used a Linux terminal before, open the Techno Guerrilla terminal and run learn linux. It walks you through navigation, permissions, and package management in a real shell before you touch the Pi.
techno-guerrilla $ sudo apt install -y gitReading package lists... Done Building dependency tree... Done Reading state information... Done The following additional packages will be installed: git-man liberror-perl The following NEW packages will be installed: git git-man liberror-perl 0 upgraded, 3 newly installed, 0 to remove and 0 not upgraded. ... Setting up liberror-perl (0.17029-2) ... Setting up git-man (1:2.47.3-0+deb13u1) ... Setting up git (1:2.47.3-0+deb13u1) ...
Permission denied editing a system file means you forgot sudo. command not found means the tool is not installed yet. Unable to locate package means your package list is stale; run sudo apt update first.
learn linux. It runs a real shell and walks you through moving around and reading files, checking each command as you type it. More tracks there cover the rest of this build.
Harden the Pi
Each service binds to a numbered TCP or UDP port: sshd binds to port 22, Synapse to 8008, AdGuard to 53. UFW's default-deny policy drops all inbound packets to ports without an explicit allow rule, so a service that is running but not explicitly allowed is unreachable.10
SSH hardening closes a second exposure. sshd supports two authentication methods: password and public-key. With password auth enabled, any machine that can reach port 22 can attempt logins; automated tools run continuously against reachable SSH ports using wordlists of common credentials.8 Setting PasswordAuthentication no disables the method entirely at the protocol level. The server sends an authentication method not allowed response before any credential is read. Public-key authentication works by challenge-response: sshd encrypts a random value with the public key on the Pi; only the holder of the matching private key can decrypt and return it.
Make the change in a drop-in file under /etc/ssh/sshd_config.d/, not in sshd_config directly. sshd reads that directory in lexical order and takes the first value it encounters for each directive; name the file 01-hardening.conf so it sorts before 50-cloud-init.conf, which Raspberry Pi OS writes and which may set its own values.20 Keep your current SSH session open while you test. If key login fails, the open session lets you recover without a monitor and keyboard.
techno-guerrilla $ sudo nano /etc/ssh/sshd_config.d/01-hardening.confPasswordAuthentication no PermitRootLogin no PubkeyAuthentication yes
techno-guerrilla $ sudo sshd -t && sudo systemctl restart ssh # test config, then apply
techno-guerrilla $ sudo apt install -y ufwtechno-guerrilla $ sudo ufw default deny incoming techno-guerrilla $ sudo ufw allow from 192.168.8.0/24 to any port 22 # allow SSH from your LAN, BEFORE enable techno-guerrilla $ sudo ufw enable
techno-guerrilla $ sudo ufw status verbose
Status: active
Logging: on (low)
Default: deny (incoming), allow (outgoing), disabled (routed)
New profiles: skip

To                         Action      From
--                         ------      ----
22 ALLOW IN 192.168.8.0/24ufw enable lock you out, recovered, then allowed SSH only from your LAN before enabling. For a live shell, open the Techno Guerrilla terminal and run learn firewall and learn keys. Run it until it is automatic.
PasswordAuthentication no seems ignored, another drop-in is winning. sshd keeps the first value it reads and loads the files in number order, so a 50-cloud-init.conf is read before a 99- file and overrides it. Confirm the effective value with sudo sshd -T | grep -i passwordauth; if it still reads yes, your file's number is too high, so rename it to sort first. If you run ufw enable before you allow SSH, your session is cut and you need console access to recover. Allow SSH first, every time.
Move to NVMe
A microSD card has a finite write endurance. A server writes continuously: logs accumulate, container state updates, and database files change with every operation. That write pattern exhausts a card faster than consumer use does.22 An NVMe SSD is built for sustained server load. Do the hardening in Unit 11 before this step: rpi-clone copies the current state of the card, including every configuration change on it, to the SSD, so the secured config carries over automatically.21
First, set the boot order while the Pi still runs from the card and no drive is attached. On many boards the Pi 5 firmware checks the NVMe before the card, so a drive that already holds an operating system (common with a used or pre-imaged SSD) would boot itself and lock you out the moment you connect it. Set the card first so it keeps booting until you choose to switch:
techno-guerrilla $ rpi-eeprom-config | grep BOOT_ORDER # read the current order
If it does not already start with the card, change it with sudo rpi-eeprom-config --edit, set BOOT_ORDER=0xf461, and save; the change is staged and takes effect on the next reboot. The card now wins while it is present, and the Pi falls through to the SSD once you pull the card. The callout at the end of this unit decodes the value digit by digit.
techno-guerrilla $ sudo rpi-eeprom-config --edit # set BOOT_ORDER=0xf461, save, then reboot
Now power off and fit the hardware. Seat the NVMe SSD in the M.2 HAT+ and connect the HAT's ribbon cable. Orientation matters: the copper contacts face the USB ports at the Pi's PCIe connector, and face up at the HAT connector. Push both holders down firmly. Power back on and SSH in. The official M.2 HAT+ enables the PCIe lane on its own. Do not add a dtparam=pciex1_gen=3 line: Raspberry Pi certifies the Pi 5's PCIe lane for Gen 2 only, and forcing Gen 3 is unsupported and can make the drive unstable, depending on the drive and cable; a third-party HAT may need a plain dtparam=pciex1 in /boot/firmware/config.txt. With the card still booting, install the clone tool:
techno-guerrilla $ git clone https://github.com/geerlingguy/rpi-clone
techno-guerrilla $ cd rpi-clone && sudo cp rpi-clone rpi-clone-setup /usr/local/sbin
techno-guerrilla $ lsblk            # the NVMe shows up as nvme0n1
techno-guerrilla $ sudo rpi-clone -f nvme0n1   # -f re-initializes a used drive, overwriting old partitions
techno-guerrilla $ lsblk
NAME          SIZE TYPE MOUNTPOINT
mmcblk0     119.1G disk                  # the booted card
├─mmcblk0p1   512M part /boot/firmware
└─mmcblk0p2 118.6G part /
nvme0n1     476.9G disk                  # the SSD target
├─nvme0n1p1   512M part
└─nvme0n1p2 476.4G part

techno-guerrilla $ sudo rpi-clone -f nvme0n1
Booted disk: mmcblk0 127.9GB   Destination disk: nvme0n1 512.1GB
== Initialize: IMAGE partition table - forced by option ==
  => mkfs -t vfat -F 32 -n bootfs /dev/nvme0n1p1 ...
  => mkfs -t ext4 -L rootfs /dev/nvme0n1p2 ...
Syncing file systems (can take a long time)
Editing /mnt/clone/boot/firmware/cmdline.txt PARTUUID to use a31034f6
Editing /mnt/clone/etc/fstab PARTUUID to use a31034f6
Done with clone to /dev/nvme0n1
Power off, remove the microSD, power back on, SSH in, then run:
techno-guerrilla $ findmnt / # SOURCE should be /dev/nvme0n1p2, not mmcblk0
TARGET SOURCE         FSTYPE OPTIONS
/      /dev/nvme0n1p2 ext4   rw,noatime
BOOT_ORDER value that controls which storage devices the firmware tries, and in what sequence. The default on many boards is 0xf146, which tries NVMe (6) before the card (1). If the SSD already holds an OS (a used drive or one imaged for another build), the firmware boots it instead of your card, the network config never runs, and the Pi is unreachable over SSH. Read the current order with rpi-eeprom-config | grep BOOT_ORDER; the hex digits are read right to left, one device per nibble: 1 = SD card, 6 = NVMe, 4 = USB mass storage, f = restart the loop. Set BOOT_ORDER=0xf461 (card → NVMe → USB) with sudo rpi-eeprom-config --edit. The change is staged to the EEPROM on the next reboot. It does not take effect immediately. With card-first order, you boot the card to run the clone in this unit, pull the card, and the firmware falls through to the SSD on every subsequent boot.
dd or the old unmaintained rpi-clone. Re-clone with the geerlingguy fork used above, which rewrites the PARTUUIDs.21 If lsblk shows no nvme0n1 at all, the HAT ribbon cable is loose or in the wrong orientation: the copper contacts face the USB ports at the Pi end and face up at the HAT end. If the SSD drops out at random, drop it to PCIe Gen 2 (remove any pciex1_gen=3 line) and use the official 27W supply.
Set up the router
The GL-AXT1800 is the network gateway: all traffic between your LAN and the internet passes through it, and the Pi's reserved IP and DNS settings are configured here. Set it up before connecting any device. The admin panel runs at 192.168.8.1; create the admin password on first login. Set the 2.4 GHz and 5 GHz SSIDs and passphrases for your primary network. Add a guest network on a separate VLAN. The GL.iNet firmware isolates guest clients from the main LAN subnet so a device on the guest network cannot initiate connections to the Pi or your laptop.
Open the admin panel at 192.168.8.1. GL.iNet ships with no admin password, so the first screen has you create one; pick a strong one.23 Set your wifi name and passphrase, and add the guest network. These are standard router steps. Follow GL.iNet's own setup guide for the exact screens on your model.
Reserve the Pi's address. Find the Pi in the router's client list (it shows as techno-guerrilla) and turn on its Reserved IP toggle. A server needs a fixed address: a dynamic lease can change on reboot, and every later step (the VPN, the chat server, the DNS filter) points at the Pi by its address. Leave the rest of DHCP as it is; later, once AdGuard Home is running on the Pi in Unit 16, you point the network's DNS at that same fixed address so every device filters through it.
Remote access
At this point the Pi is reachable only on your local subnet. It has a private RFC 1918 address behind NAT and no port forwarding. WireGuard is a kernel-level VPN that establishes encrypted tunnels between peers; Headscale is an open-source control plane that distributes WireGuard public keys and assigns each enrolled device a 100.64.0.0/10 address (the CGNAT range Tailscale uses). Once enrolled, devices route to each other over those tunnels regardless of where they are on the internet. The Pi binds its services to its 100.x address, so only enrolled VPN peers can reach them, with nothing forwarded or exposed to the public internet.24
Two names appear for one system, and the difference decides where your traffic goes. Tailscale is a company that makes the client software and runs a hosted coordinator. Headscale is an open-source coordinator you run yourself in place of the hosted one. You install Tailscale's client on every device and point it at your Headscale with --login-server, so the client software is Tailscale's and the coordinator is yours. The coordinator has one job: it exchanges the peers' public keys and helps two devices behind NAT find each other. Once two devices hold each other's keys, their traffic flows directly between them and does not pass through the coordinator. The VPS therefore never sees the contents of your traffic, and a busy link between two devices does not consume the VPS's bandwidth. Only when two peers cannot reach each other directly do they fall back to a relay, which the coordinator can provide.
The Headscale coordinator must be reachable by every peer on the public internet to exchange keys and coordinate NAT traversal, so it runs on a VPS with a static public IP and a domain name, not on the Pi or any device behind your router. Headscale is a single Go binary; a 1-core, 1 GB VPS is sufficient. Build the coordinator first, then enroll the Pi.
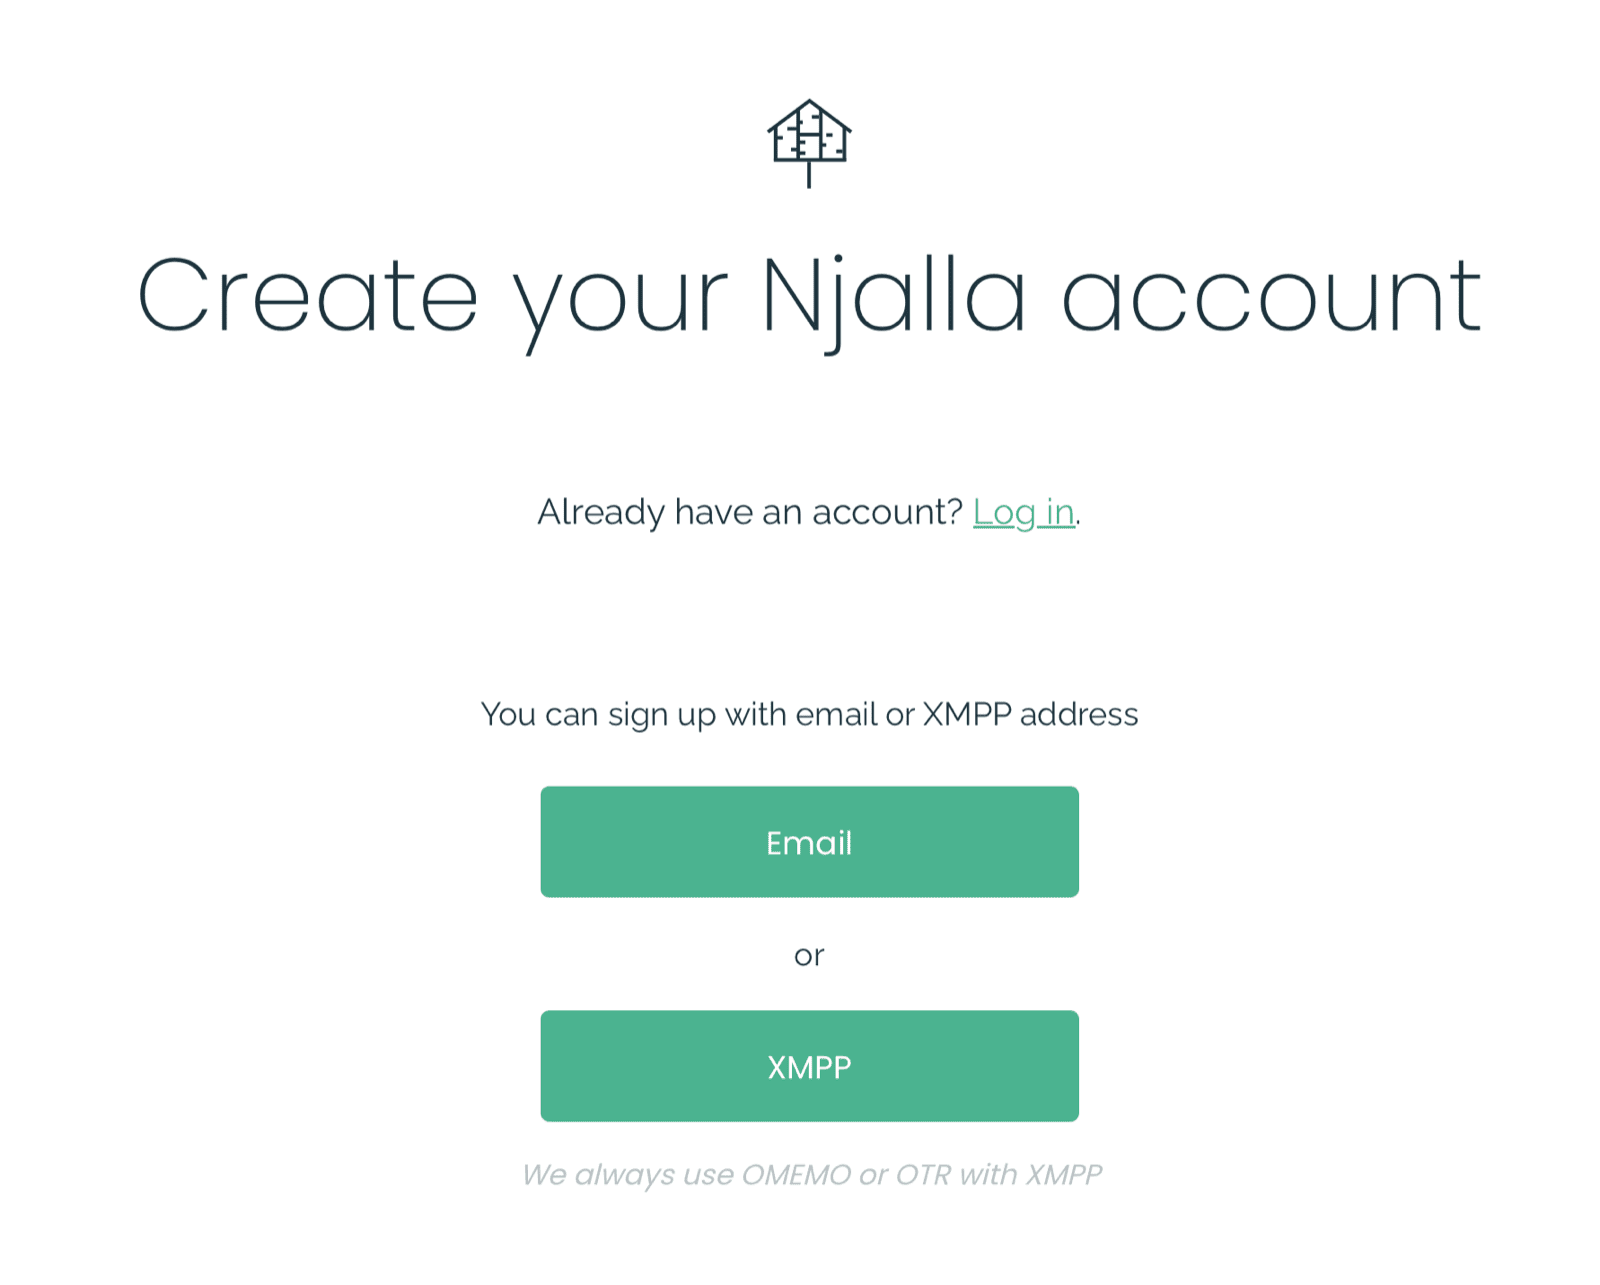
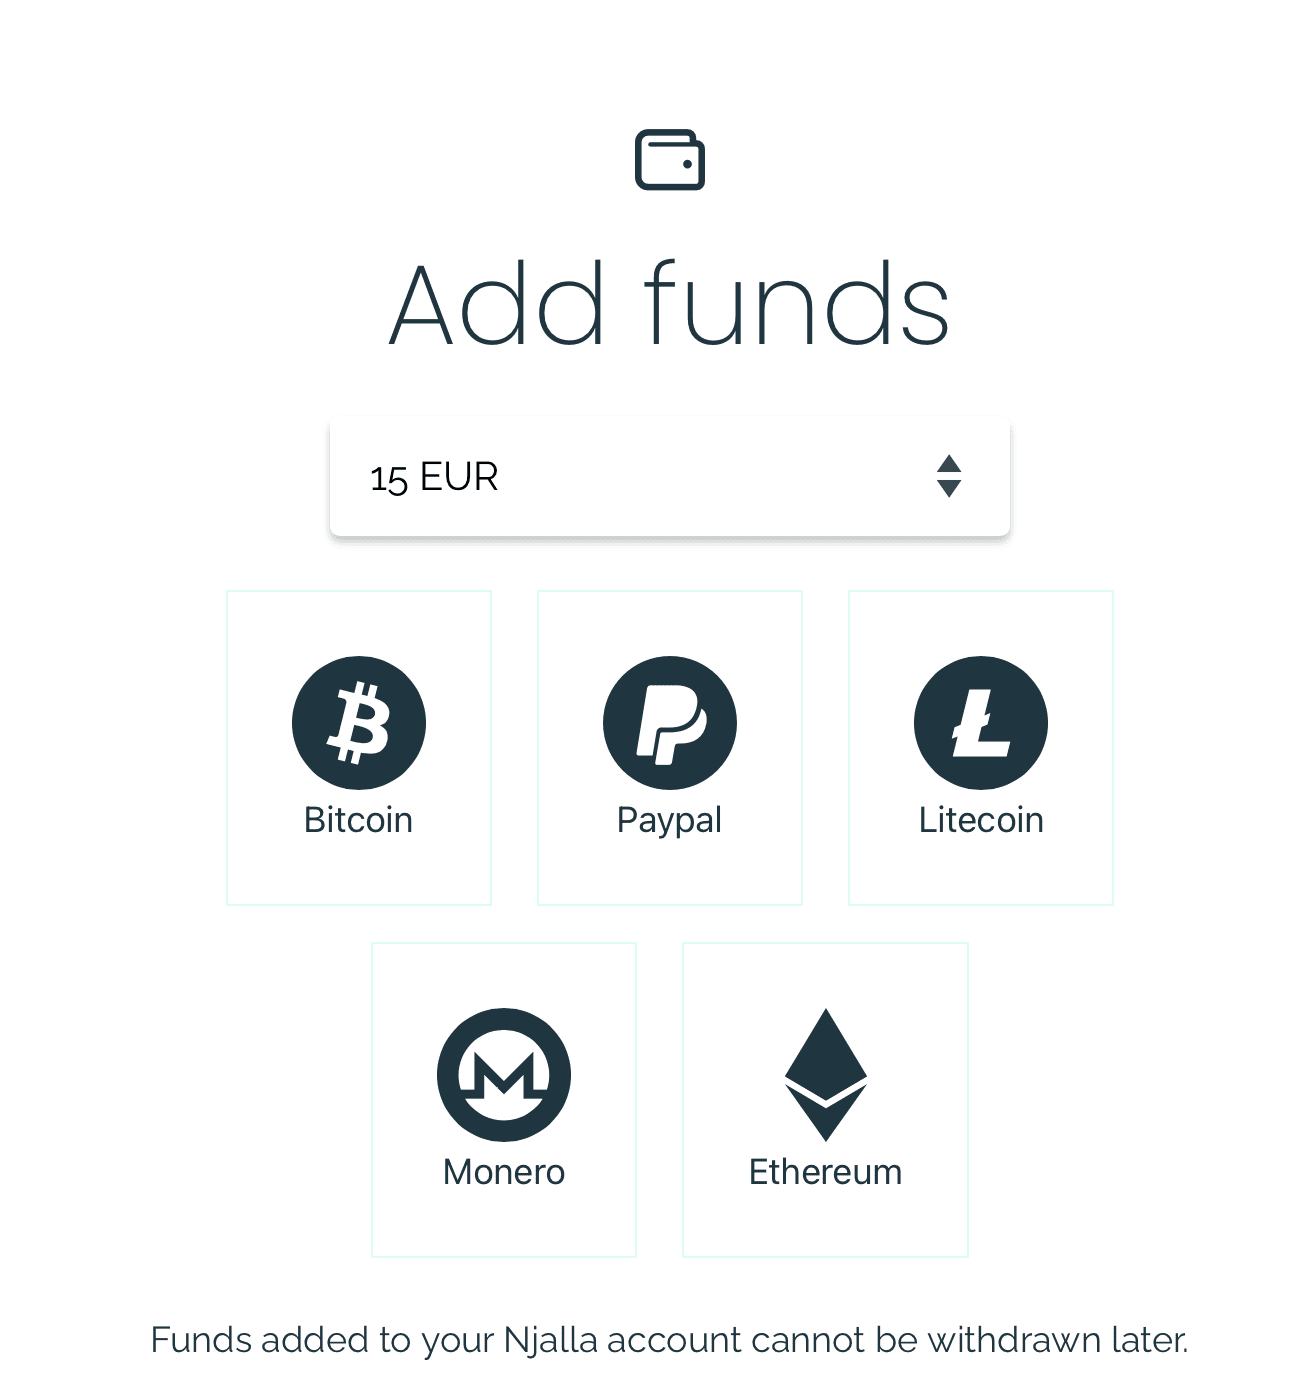
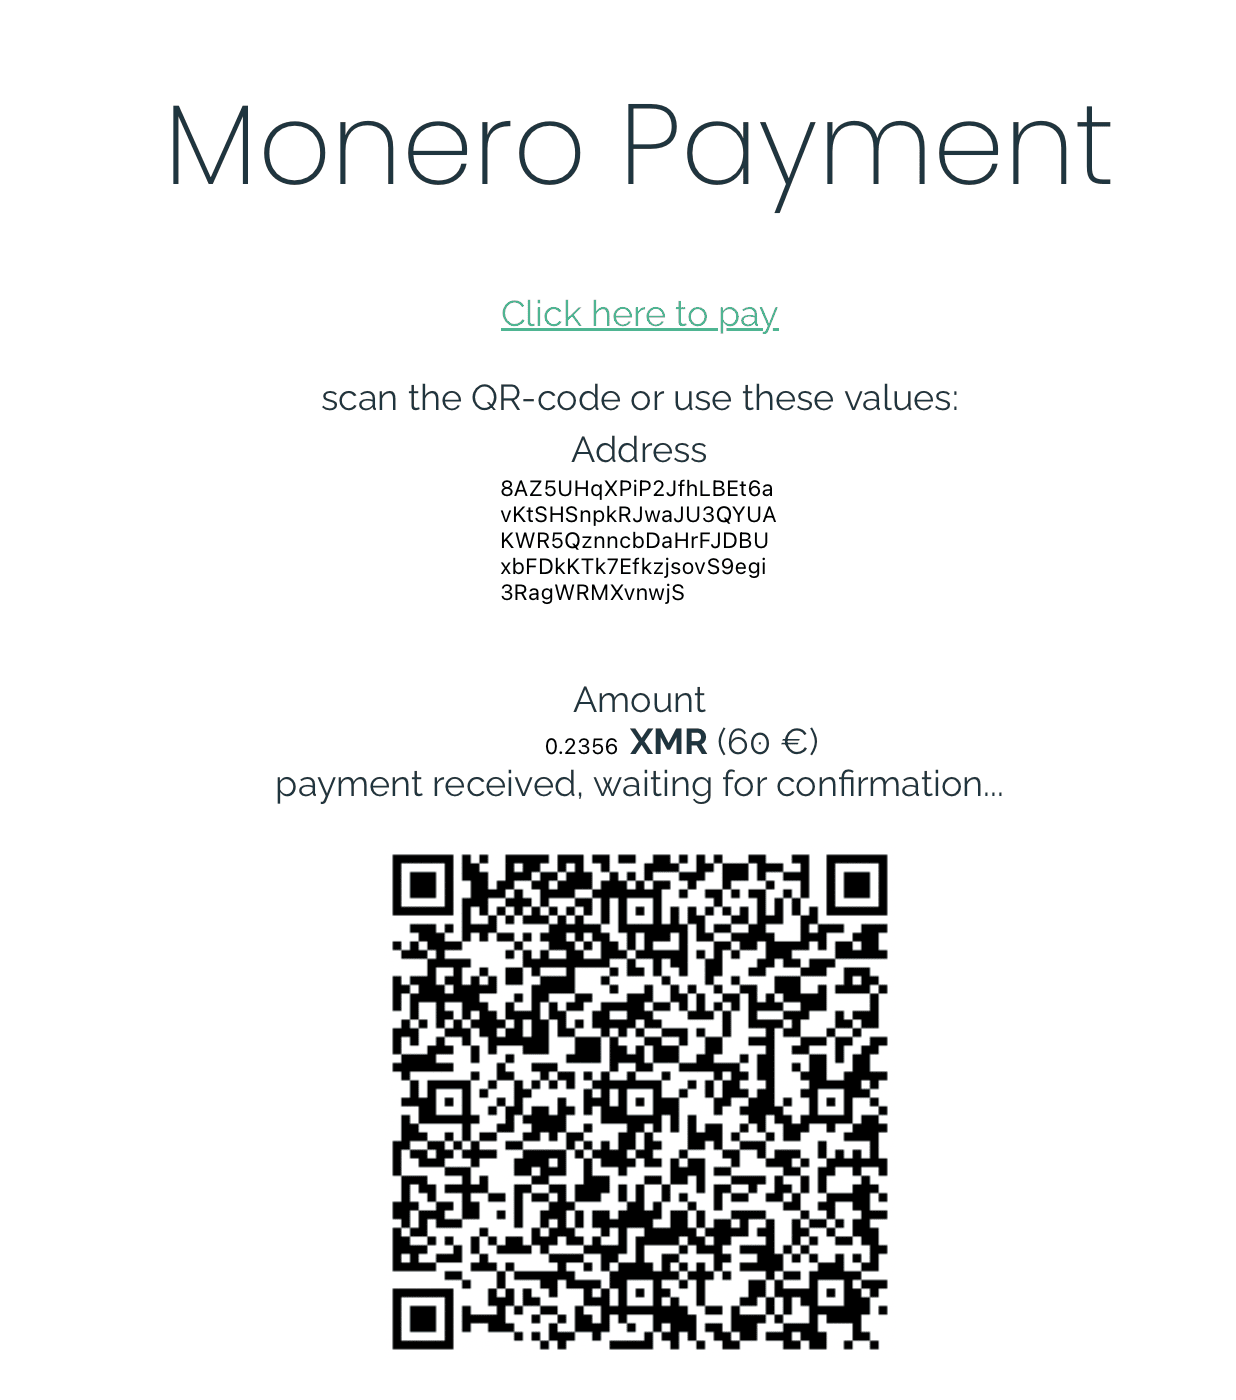
Getting the VPS and the domain. If you have never rented a server, the screen record below walks the whole purchase, from account to DNS record. Any host works if its smallest tier gives you a static public IPv4 address, Debian or Ubuntu as the operating system image, and root SSH access; a commodity host charges about $5 a month for that. A privacy-focused host such as Njalla charges about $15 a month, takes signup with nothing but an email or XMPP address, and accepts Monero. Either way, what you get is a small Linux machine, and everything this module did on the Pi (SSH, keys, UFW) works the same on it.
The domain comes from any registrar, at $10 to $15 a year for an ordinary name; Njalla registers domains at about $15 a year. What matters is that you can edit its DNS records, because a step below adds an A record there, and DNS changes can take minutes to hours to propagate on first setup. The host and the registrar both know who pays them.
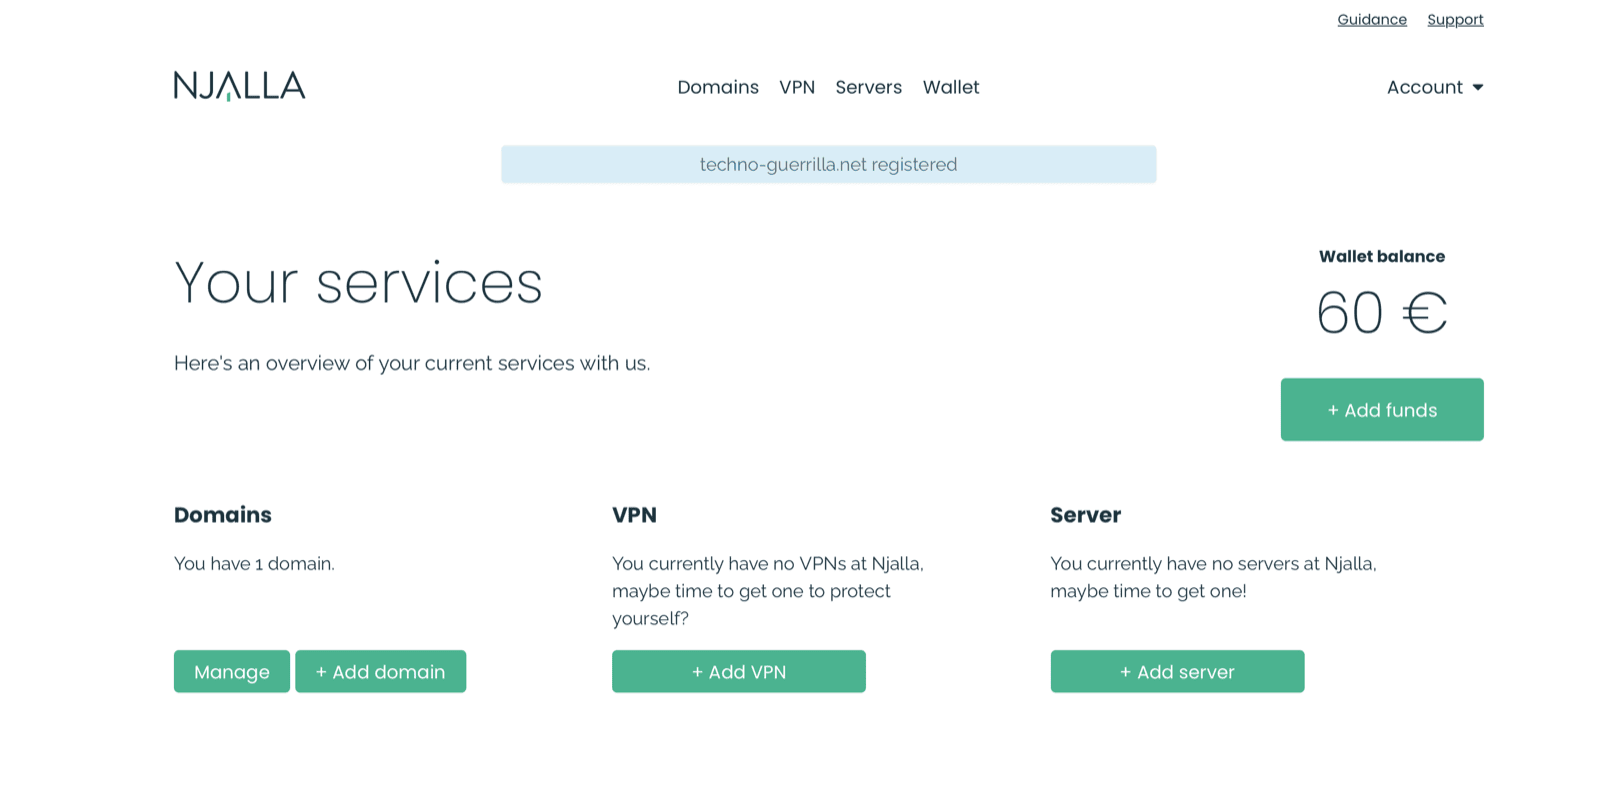
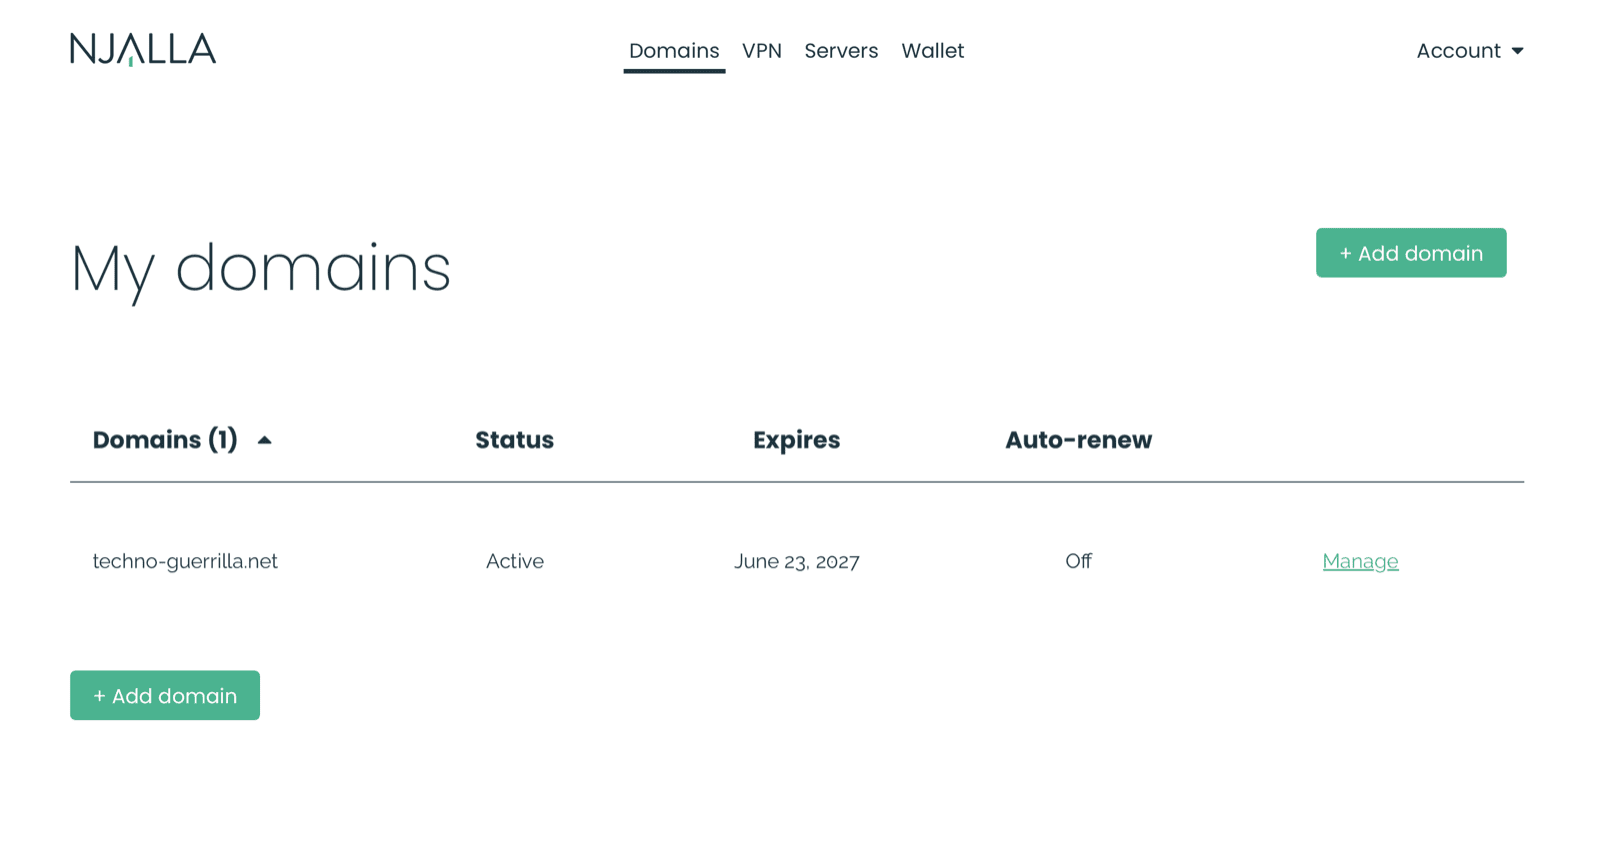
techno-guerrilla.net active. This build leaves auto-renew off; set a calendar reminder or turn it on.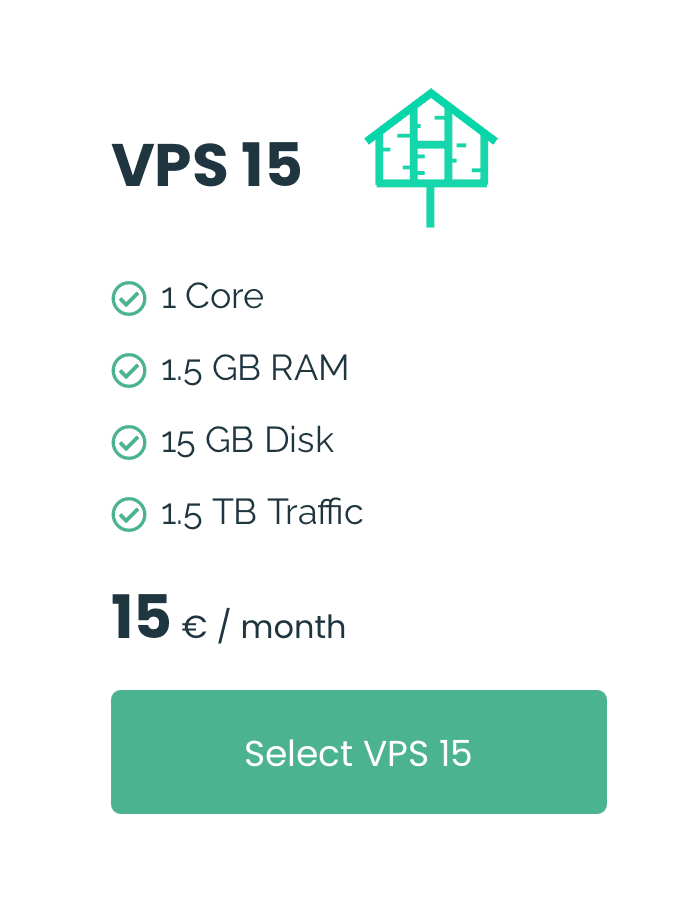
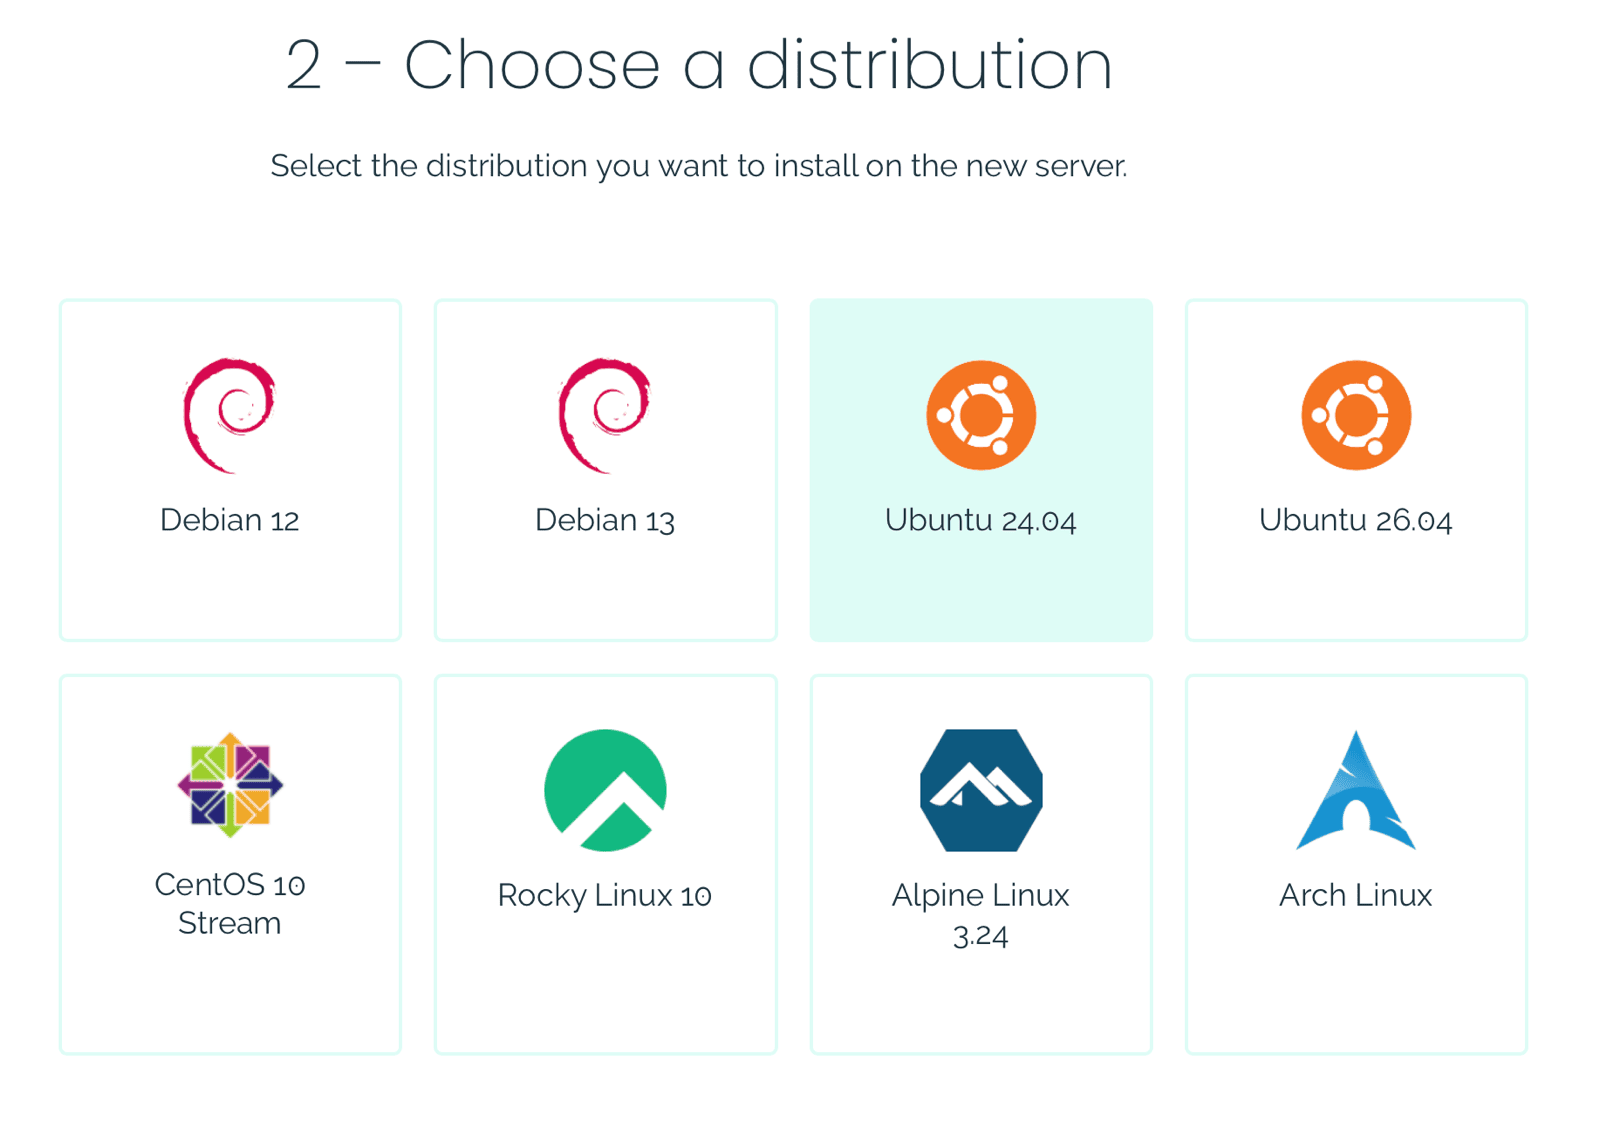
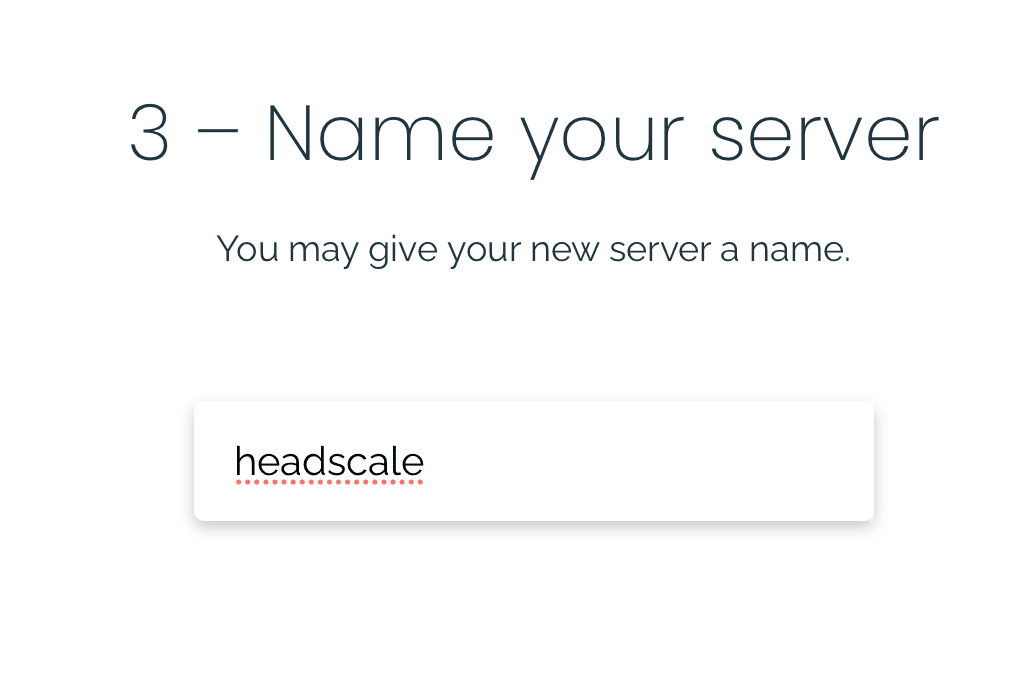
headscale.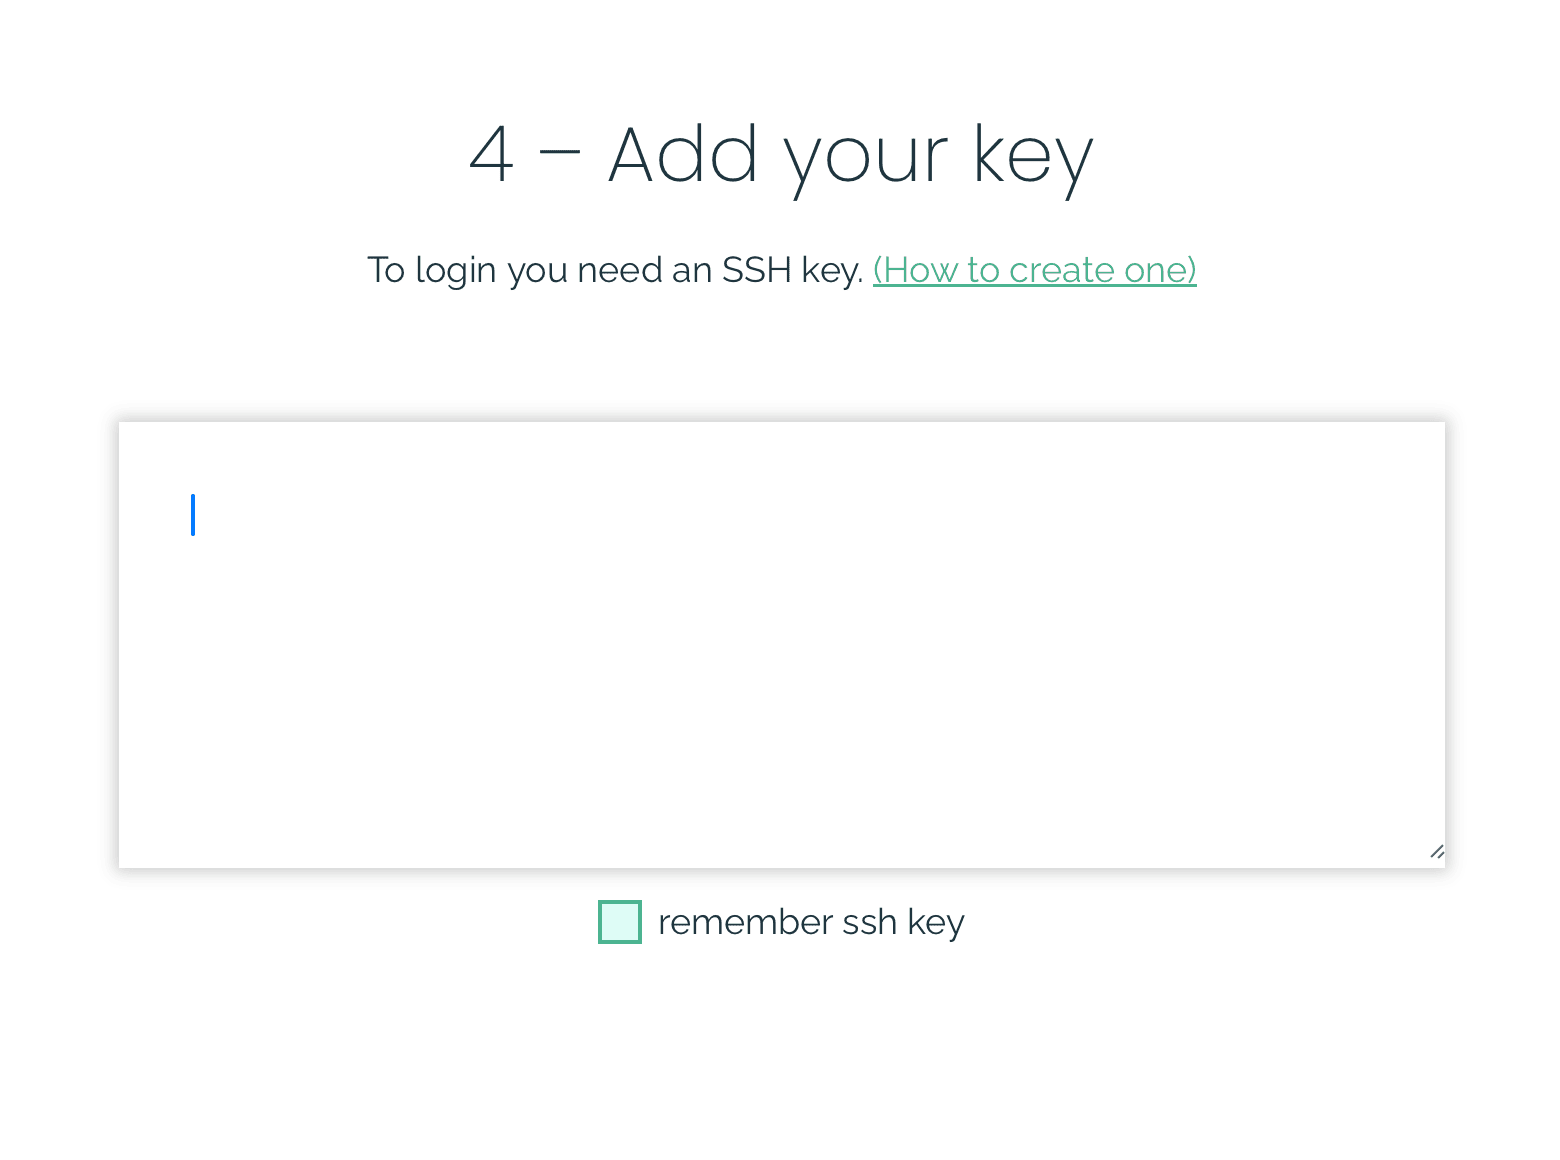
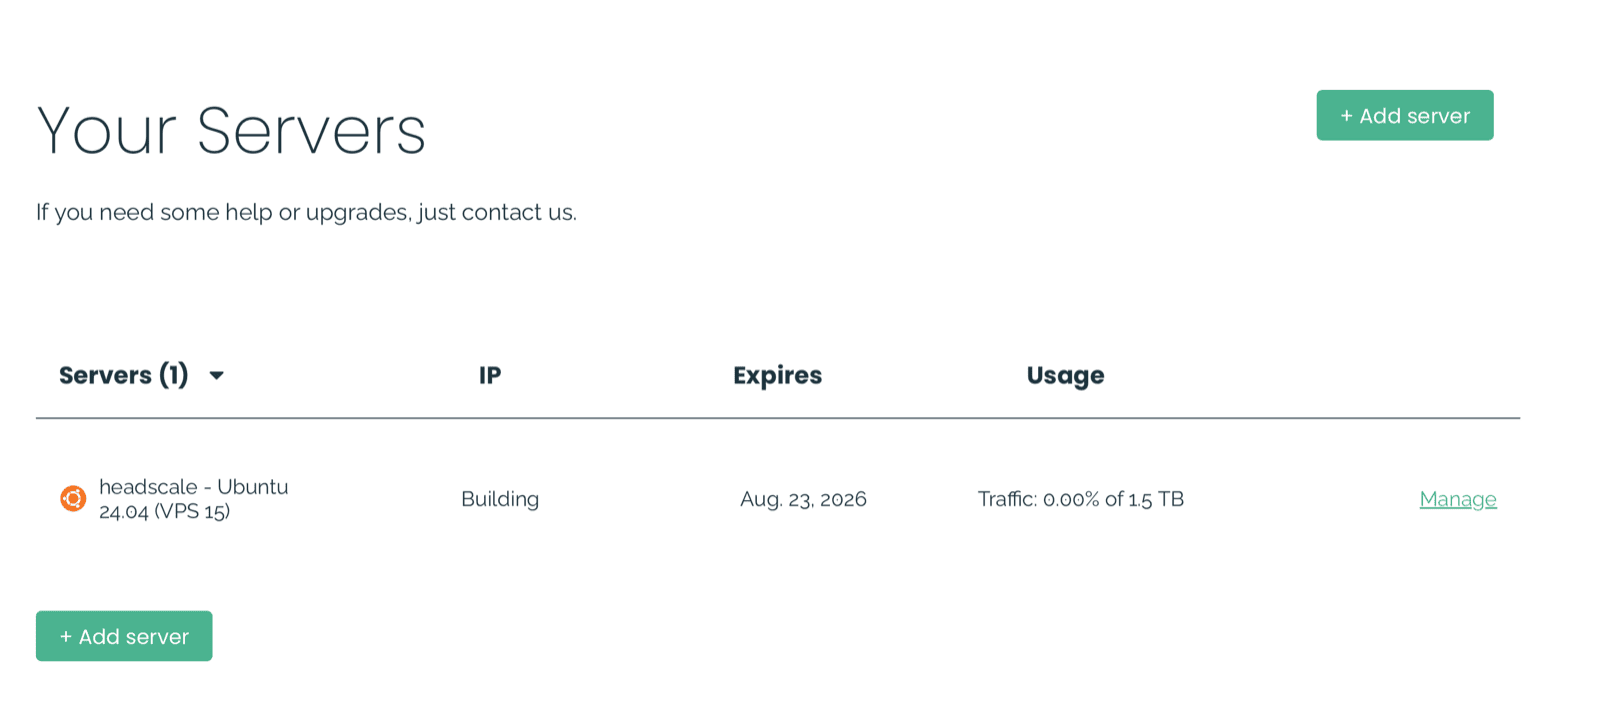
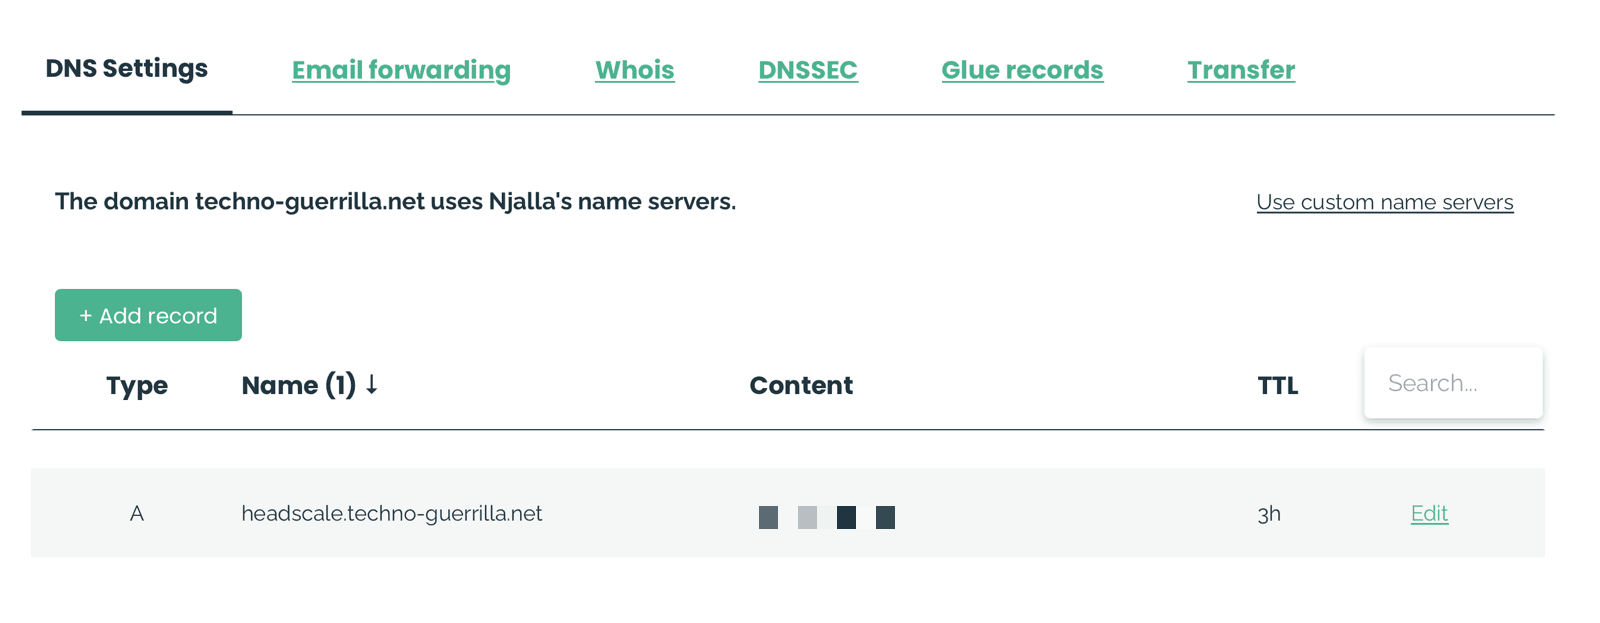
headscale.your-domain pointed at the VPS's public address. Clients dial this name.Apply the same hardening as Unit 11 to the VPS the moment it is provisioned: SSH key-only via a drop-in config, UFW default-deny with ports 22, 80, and 443 open. Port 80 lets Caddy answer the ACME HTTP-01 challenge and redirect plain HTTP to HTTPS; port 443 is the HTTPS endpoint Tailscale clients dial, and the port where Caddy runs its TLS-ALPN-01 certificate challenge.
headscale $ printf 'PasswordAuthentication no\nPermitRootLogin prohibit-password\n' \
    | sudo tee /etc/ssh/sshd_config.d/01-hardening.conf
headscale $ sudo systemctl restart ssh
headscale $ sudo ufw default deny incoming
headscale $ sudo ufw allow 22      # SSH
headscale $ sudo ufw allow 80      # ACME cert challenge
headscale $ sudo ufw allow 443     # HTTPS control channel
headscale $ sudo ufw enable
Give the server a name in DNS. At your domain host, add an A record pointing headscale.your-domain at the VPS's public address. The web server cannot fetch a certificate for a name that does not yet resolve, so do this before the next steps.
Now install Headscale itself from its package. Check the releases page for the current version and swap it into the command below; the commands here were verified against v0.29.2. Set two values in /etc/headscale/config.yaml: server_url is the public HTTPS address clients dial, and listen_addr stays on 127.0.0.1 so Headscale answers only the local machine. The web server in front is the only thing that reaches it from outside.
headscale $ wget -qO /tmp/headscale.deb \
    https://github.com/juanfont/headscale/releases/download/v0.29.2/headscale_0.29.2_linux_amd64.deb
headscale $ sudo apt install -y /tmp/headscale.deb
headscale $ sudo nano /etc/headscale/config.yaml   # set the two lines below
server_url: https://headscale.your-domain
listen_addr: 127.0.0.1:8080
headscale $ sudo systemctl enable --now headscaleheadscale $ headscale version v0.29.2 headscale $ curl -s http://127.0.0.1:8080/health {"status":"pass"}
Headscale binds to 127.0.0.1:8080 and speaks plain HTTP. It is not exposed directly. Caddy listens on port 443, terminates TLS, and reverse-proxies to localhost:8080. On startup Caddy issues an ACME TLS-ALPN-01 challenge over port 443 to obtain a Let's Encrypt certificate for the domain, then renews it automatically before expiry.
The Tailscale client does not speak plain HTTP to the coordinator; it sends a POST with the header Upgrade: tailscale-control-protocol to upgrade the connection to Tailscale's control channel. Caddy, Nginx, and Apache pass that handshake straight through. A Cloudflare Tunnel cannot: it understands only the standard websocket upgrade and drops the custom one, so a node never finishes registering and the attempt fails with a 500 error.33
headscale $ sudo apt install -y debian-keyring \
    debian-archive-keyring apt-transport-https curl
headscale $ curl -1sLf 'https://dl.cloudsmith.io/public/caddy/stable/gpg.key' \
    | sudo gpg --dearmor -o /usr/share/keyrings/caddy-stable-archive-keyring.gpg
headscale $ curl -1sLf 'https://dl.cloudsmith.io/public/caddy/stable/debian.deb.txt' \
    | sudo tee /etc/apt/sources.list.d/caddy-stable.list
headscale $ sudo apt update && sudo apt install -y caddy
headscale $ sudo nano /etc/caddy/Caddyfile   # the whole file is three lines
headscale.your-domain {
    reverse_proxy localhost:8080
}headscale $ sudo systemctl restart caddy# from your laptop, the public address, real certificate, served through Caddy $ curl https://headscale.your-domain/health {"status":"pass"}
Last, create a user on the coordinator and mint a pre-auth key. That key is what registers the headless Pi in one command, with no browser login.25 Make it reusable if you plan to enroll more than one device.
headscale $ sudo headscale users create tg
headscale $ sudo headscale preauthkeys create --user 1 --reusable --expiration 24h
User created
hskey-auth-<your key>
Install the Tailscale client on the Pi. The client is the same binary used with the hosted Tailscale service; --login-server redirects it to your Headscale coordinator instead. Normal enrollment opens a browser for OAuth; the Pi has no display, so --authkey skips that flow entirely. Headscale validates the pre-auth key, registers the node under the tg user, and assigns it a 100.64.x.x address.25 The install command pipes a vendor's script straight into a shell. Both this script and Docker's in the next unit are short, published installers, and you can read either one before you run it.
techno-guerrilla $ curl -fsSL https://tailscale.com/install.sh | shtechno-guerrilla $ sudo tailscale up \ --login-server https://headscale.your-domain --authkey YOUR_KEY techno-guerrilla $ tailscale ip -4 # the 100.x you bind to in Unit 15
techno-guerrilla $ sudo tailscale up --login-server https://headscale.your-domain --authkey <key>
Success.
techno-guerrilla $ tailscale ip -4
100.64.0.1
techno-guerrilla $ tailscale status
100.64.0.1   techno-guerrilla   tg   linux   -
The Pi now holds a second address, 100.64.0.1, that belongs to the tunnel and is reachable from any other enrolled device. To reach it by name rather than by number, enable MagicDNS on the coordinator. MagicDNS gives each enrolled device a name under a private domain you choose. Add these lines to /etc/headscale/config.yaml on the VPS and restart Headscale.
dns:
  magic_dns: true
  base_domain: tnet.internal   # a private name, not a real public domain
The firewall you set in Unit 11 allows port 22 from the LAN only, and it stays that way. The tailnet carries the Pi's services, not a shell: you administer the Pi from the LAN, so an enrolled device that is lost or compromised holds no path to a login prompt. With MagicDNS on, an enrolled device reaches those services by name over the tunnel; Unit 15 binds the chat server to the tunnel address that name resolves to.
You now have more than one way to reach the Pi, and which one works depends on where you are. On your own LAN, the private address (192.168.8.152) and the .local name both work, because both are resolved and routed on that network. Away from the LAN, neither does: a private address means nothing on a network it does not belong to, and a .local name is a local-network name only. The tunnel address (100.x) and its MagicDNS name work from either place, because the tunnel carries them wherever the device is. One symptom is worth recognizing. If you try the LAN address while away and an exit node is active, the request is sent out through the exit node, which also cannot reach your home LAN, so the command hangs and then times out instead of failing at once. That looks like the Pi is down when it is only unreachable by that name, and the tunnel name still works.
Reaching the Pi and logging into it are separate steps, enforced by separate controls. The firewall from Unit 11 decides which sources may reach port 22 at all: your LAN subnet only, never the public internet or the tunnel. The tunnel decides which devices are on the network in the first place, because only enrolled peers hold a 100.x address; it carries the Pi's services, not a shell. The SSH key from Module 00 decides who may log in once a connection reaches the Pi. These layers do not replace one another: an attacker who joined your tunnel holds no path to port 22, and an attacker who held your key but sat outside your LAN could not reach the port.
Where your traffic comes out. The tunnel you just built encrypts the link between your devices. It does not, on its own, change where your traffic reaches the internet: a laptop on hotel Wi-Fi still exits through that hotel's connection, and the local network still sees which sites it opens. A tunnel can carry that too, if you route it through an exit node: one enrolled device that forwards the others' internet traffic. Every destination then sees the exit node's public address instead of the device's, and the network the device is physically on sees only encrypted traffic to a single address. You turn a device into an exit node with tailscale up --advertise-exit-node (it needs IP forwarding enabled for both IPv4 and IPv6, or v6 traffic leaks around the tunnel), approve the route on the coordinator, and point a client at it with tailscale up --exit-node=<name> --exit-node-allow-lan-access, the last flag keeping local devices like your Pi reachable while everything else is tunnelled.
An exit node only helps when the exit is somewhere better than where you are. An exit node in your own home is useful on the road (the café or hotel sees only a tunnel to one address), but it does nothing against your home ISP, because the traffic still leaves on your own line with your own address. An exit node on a rented server elsewhere gives a shared address not tied to any one location. And be deliberate about a group: route a whole team through one person's home connection and every member's browsing now appears to come from that person, timestamped on their line. For a team, an exit belongs on a server, not on someone's house. The choice is also per device and per task: run the tunnel for browsing and messaging, which are small and worth hiding, and leave heavy video off it, which is large and is no secret to begin with.
100.x tunnel address as the resolver, not a public one. A common misstep is leaving the coordinator's default DNS pointed at a public resolver like 1.1.1.1 with override on, which silently sends every enrolled device's lookups past the AdGuard you built.
Phones and other devices on cellular. A device on a home or office network can usually open a direct encrypted path to its peers. A phone on a cellular connection often cannot: the carrier places it behind a shared, locked-down address (carrier-grade NAT), and two devices behind that kind of address cannot reach each other directly. When a direct path fails, the tunnel falls back to a relay: a public server that passes the encrypted traffic between the two peers. The contents stay encrypted end to end, so the relay cannot read them, but it does see the pattern: which of your nodes is talking to which, and when. By default those relays are the VPN vendor's own servers, which puts a third party back in the path for exactly the metadata this build works to keep in your hands. The fix matches the rest of the module: your coordinator can run its own relay, so a phone that cannot connect directly falls back through a server you control instead of the vendor's. For roaming devices the sensible posture is the tunnel for reaching your own services, without necessarily routing all their general internet traffic through a distant exit node, which only adds delay to traffic that does not need hiding.
Run the Matrix server
Docker is a container runtime: it packages a service and its dependencies into an isolated filesystem namespace with its own process tree, so the service cannot modify the host system outside its container. Each container runs as an unprivileged process on the host kernel: no separate VM, no hardware emulation. Docker Compose reads a compose.yaml file that declares the image, port bindings, volume mounts, and restart policy, then brings the container up with docker compose up -d. Install Docker via the official convenience script, then add your user to the docker group so you can run Docker commands without sudo:
techno-guerrilla $ curl -fsSL https://get.docker.com | sh
techno-guerrilla $ sudo usermod -aG docker $USER && newgrp docker
Synapse is the reference Matrix homeserver implementation, written in Python and maintained by Element. It serves the Matrix client-server API on port 8008 and, when federation is enabled, the server-server API on port 8448. In the Docker Compose ports directive, the syntax "HOST_IP:HOST_PORT:CONTAINER_PORT" tells the Docker network stack which host address to bind the published port to. Specifying 0.0.0.0:8008:8008 binds to every interface: the VPN interface, the LAN interface, and any other the kernel has. Specifying 100.64.0.1:8008:8008 binds only to the WireGuard interface assigned that address; the kernel drops inbound packets to port 8008 arriving on any other interface before they reach the container. Registration is off by default when enable_registration is absent from homeserver.yaml.
Federation off is what keeps the server private. A Matrix server with federation enabled contacts other homeservers to route messages, which means those servers learn your homeserver exists, when it is active, and which accounts it exchanges traffic with.28 Turning federation off means your server generates no outbound traffic to other Matrix infrastructure. The only connections it handles are your own clients connecting over the VPN. Your team's messaging metadata, who talked to whom and when, stays inside the infrastructure you control.
Metadata (who communicated with whom, when, and how often) is collected and actioned independently of message content. A 2013 FISC court order (Docket BR 13-80) compelled Verizon Business Network Services to produce all call detail records for domestic and international calls daily on an ongoing basis, with no individualized suspicion required for any subscriber.26 Former NSA Director and CIA Director Michael Hayden said at a Johns Hopkins University debate in 2014: "We kill people based on metadata."27 A Matrix homeserver logs every room membership event, message timestamp, and device key exchange. A commercial operator holds those logs and can be compelled by legal process (a court order, a national security letter with a gag clause, or a government seizure) to produce them. The server in this build has no operator other than you; there is no third party to compel.
Generate the configuration once. This writes homeserver.yaml and a signing key for your server name into a data folder.
techno-guerrilla $ mkdir -p ~/synapse/data
techno-guerrilla $ docker run --rm -v ~/synapse/data:/data \
    -e SYNAPSE_SERVER_NAME=your-domain -e SYNAPSE_REPORT_STATS=no \
    matrixdotorg/synapse:latest generate
Make it private in homeserver.yaml. In the port 8008 listener, keep client in names and remove federation; then add an empty whitelist so the server makes no outbound federation calls. Registration is closed already by default.
listeners:
  - port: 8008
    type: http
    resources:
      - names: [client]          # federation removed

federation_domain_whitelist: []    # no outbound federation
Write the compose file. The ports line is the control that matters: it publishes Synapse only on the Pi's VPN address (the 100.x from Unit 14), so nothing outside the tunnel can reach it. Synapse also publishes the same image at ghcr.io/element-hq/synapse; if the matrixdotorg name ever retires, swap the image: line to that name.
services:
  synapse:
    image: matrixdotorg/synapse:latest
    container_name: synapse
    restart: unless-stopped
    volumes:
      - ./data:/data
    ports:
      - "100.64.0.1:8008:8008"     # your Pi's tailscale ip -4
Start it, then confirm it is bound to the VPN address and refused on every other.
techno-guerrilla $ cd ~/synapse && docker compose up -dtechno-guerrilla $ docker compose up -d Network synapse_default Created Container synapse Started techno-guerrilla $ ss -tlnp | grep 8008 LISTEN 0 4096 100.64.0.1:8008 0.0.0.0:* # the VPN address only techno-guerrilla $ curl -s -o /dev/null -w '%{http_code}\n' http://100.64.0.1:8008/_matrix/client/versions 200 # reachable over the VPN techno-guerrilla $ curl ... http://192.168.8.152:8008/_matrix/client/versions 000 # refused on the LAN address, not exposed
Registration is closed, so no one can create an account from a client. The admin creates each account on the server. The register_new_matrix_user tool authenticates with the registration_shared_secret that generate wrote into homeserver.yaml, so it works even with public registration off. Run it through docker exec -it: the -it flags attach a terminal so the tool can prompt for the password. Omit them and the prompt has no terminal to read from and the command fails. The -a flag registers this first account as an admin.
techno-guerrilla $ docker exec -it synapse register_new_matrix_user \
-c /data/homeserver.yaml -u admin -a http://localhost:8008New password: Confirm password: Sending registration request... Success!
Create an account for each teammate the same way, with --no-admin in place of -a so they register as regular users. Choose a username, set a password at the prompt, and hand both to that person over a channel only they can read.
techno-guerrilla $ docker exec -it synapse register_new_matrix_user \
-c /data/homeserver.yaml -u alice --no-admin http://localhost:8008New password: Confirm password: Sending registration request... Success!
Each teammate installs Element, joins the VPN, points the client at your homeserver, and signs in with the username and password you issued. Send the first message.
0.0.0.0 instead of the VPN address, the server is reachable from the public internet and "no open ports" is gone. Always bind to the 100.x VPN address. If federation still seems on, check that the listener no longer lists federation in its resources and that the whitelist is empty.
Block ads & trackers: AdGuard Home in Docker
DNS (Domain Name System) resolves hostnames to IP addresses. Every connection (HTTPS, SSH, Matrix client sync) begins with a DNS query. By default that query goes in plaintext UDP to port 53 at the resolver your ISP or DHCP server assigns, before any application-layer encryption applies and before a VPN tunnel exists to carry it. The resolver sees every domain name the device looks up, timestamped, tied to your IP address.
A VPN encrypts the data connection after it opens; it does not automatically encrypt or reroute the DNS query that preceded it. A commercial VPN routes your DNS to the provider's own resolver by default, trading your ISP's view for the provider's unless you set the upstream yourself.30 Running AdGuard Home on the Pi as your LAN resolver keeps DNS queries on your network, with an encrypted upstream (DNS-over-TLS to a resolver you select) so queries leaving the Pi are wrapped in TLS rather than sent in plaintext UDP. That encrypted upstream is the simple first step, and it still hands your lookups to whichever resolver you pointed at; later in this unit you remove even that operator. AdGuard Home also evaluates each query against blocklists: domains on the list (ad networks, trackers, malware C2) return 0.0.0.0 and the connection never opens, for every device on the LAN at once.
Intelligence agencies treat DNS as a surveillance layer of its own. The NSA ran covert infrastructure called MORECOWBELL that actively queried DNS servers thousands of times an hour, from servers it rented abroad so the traffic could not be traced back to it, to map services and watch for changes.29 Whoever runs the resolver you use sees every name you look up, and the resolver in this build is yours.
Run AdGuard Home as a container. Create ~/adguard, write this compose file there, and run the commands from that directory. It uses the official image, maps the DNS port and the dashboard, and persists its config and data:31
services:
  adguardhome:
    image: adguard/adguardhome
    container_name: adguardhome
    restart: unless-stopped
    ports:
      - "53:53/tcp"
      - "53:53/udp"
      - "3000:3000/tcp"   # setup, then the dashboard
    volumes:
      - ./work:/opt/adguardhome/work
      - ./conf:/opt/adguardhome/conf
AdGuard serves the whole LAN, so allow DNS and the first-run setup page through the firewall you set in Unit 11.
techno-guerrilla $ sudo ufw allow from 192.168.8.0/24 to any port 3000 proto tcp   # first-run setup page
techno-guerrilla $ sudo ufw allow from 192.168.8.0/24 to any port 53   # DNS, from your LAN
techno-guerrilla $ docker compose up -dOpen http://techno-guerrilla.local:3000 once to finish setup: set an admin login, keep the web interface on port 3000, then set the upstream to a DNS-over-TLS server you chose and add the ad and tracker blocklists. Last, point the network's DNS at the Pi: in the router, set the DHCP DNS server to the Pi's address, so every device resolves through AdGuard.
One trust you have not removed yet. A DNS-over-TLS upstream encrypts the query in transit, but the resolver on the other end (Quad9, Cloudflare, whoever you picked) still receives every name you look up. You have traded your ISP for that operator. For a build whose whole argument is that there is no third party to compel, an upstream resolver is the one third party left in the path. You can delete it. Run a recursive resolver on the Pi and have AdGuard forward to it instead. Unbound is the standard one: rather than ask an upstream, it walks the DNS hierarchy itself, starting from the root name servers, and asks each authoritative server in turn until it has the answer. No single operator sees all your lookups anymore; instead each domain's own name server sees only the queries for that domain, which is the minimum any resolver can leak. The trade: a first, uncached lookup is slower because Unbound does the walk, and the queries now leave from your own address rather than a big shared resolver's. Point AdGuard's upstream at the local Unbound (127.0.0.1 on its own port) and the chain becomes device → AdGuard → Unbound → the internet's authoritative servers, all of it on hardware you hold.
Unbound also validates DNSSEC: it checks the cryptographic signatures a domain publishes on its records, so a forged or tampered answer is rejected rather than returned. You can prove it works: a deliberately broken test domain must fail, and a correctly signed one must return an authenticated answer.
# a domain with intentionally broken signatures is refused (SERVFAIL):
$ dig @127.0.0.1 dnssec-failed.org +dnssec | grep status
;; ->>HEADER<<- opcode: QUERY, status: SERVFAIL

# a correctly signed domain returns the answer with the 'ad' (authenticated data) flag:
$ dig @127.0.0.1 internetsociety.org +dnssec | grep flags
;; flags: qr rd ra ad; QUERY: 1, ANSWER: 3
Settings → Privacy and security → Use secure DNS → off; for a fleet you set it once as a managed policy. Then confirm a blocked domain is still blocked in the browser, not just at the command line.
techno-guerrilla $ docker compose up -d
 Network adguard_default  Created
 Container adguardhome    Started
techno-guerrilla $ ss -tulpn | grep ':53'
udp UNCONN 0.0.0.0:53 ... docker-proxy   # DNS, serving the LAN
tcp LISTEN 0.0.0.0:53 ... docker-proxy

# from a laptop on the LAN, querying the Pi's resolver:
$ dig +short @192.168.8.152 example.com
104.20.23.154                            # a normal name resolves
$ dig +short @192.168.8.152 doubleclick.net
0.0.0.0                                   # a known tracker, blocked
sudo ss -tulpn | grep :53.
Back it up
Three directories hold everything needed to rebuild the stack: ~/synapse/ (compose file, homeserver.yaml, signing key, and the SQLite database at data/homeserver.db), ~/adguard/ (compose file and config at conf/AdGuardHome.yaml), and the GL.iNet router's exported configuration (download it from the admin panel under System → Backup and save it into the backups folder yourself). The script in this unit archives the two service directories with tar, writes a timestamped .tar.gz to /home/user/backups on the SSD (swap in your own username), and runs on a daily root cron job. After writing the script, stop Synapse, extract the archive to a test directory, and confirm homeserver.db and homeserver.yaml are present and readable. A backup that has never been restored is unverified.
#!/usr/bin/env bash
set -euo pipefail
STAMP=$(date +%F)
DEST="/home/user/backups"; mkdir -p "$DEST"
ARCHIVE="$DEST/techno-guerrilla-$STAMP.tar.gz"

# compose files, configs, and the Matrix data (add a router/ dir for the router export)
tar czf "$ARCHIVE" -C /home/user synapse adguard
echo "Saved: $ARCHIVE ($(du -h "$ARCHIVE" | cut -f1))"

# copy off the device: set your backup target
BACKUP_HOST=""          # e.g. user@backup-host:/backups
[ -n "$BACKUP_HOST" ] && rsync -a "$ARCHIVE" "$BACKUP_HOST"

# restore test: pull a known file back out and confirm it is there
TMP=$(mktemp -d)
tar xzf "$ARCHIVE" -C "$TMP" synapse/data/homeserver.yaml
test -f "$TMP/synapse/data/homeserver.yaml" && echo "Restore test: OK"
rm -rf "$TMP"
Run it as root so it can read the container data, and schedule it to run unattended.
techno-guerrilla $ chmod +x backup.sh && sudo ./backup.sh
techno-guerrilla $ sudo crontab -e   # add: 0 3 * * * /home/user/backup.sh
techno-guerrilla $ sudo ./backup.sh
Saved: /home/user/backups/techno-guerrilla-2026-06-24.tar.gz (1.4M)
Restore test: OKVerify & own it
Check the firewall and what is listening. Confirm the chat server answers on the VPN address, the local services (SSH, DNS) are scoped to your LAN, and nothing sits on a public address:
techno-guerrilla $ sudo ufw status verbosetechno-guerrilla $ ss -tlnp # what is listening, and on which address
techno-guerrilla $ sudo ufw status verbose
Status: active
Default: deny (incoming), allow (outgoing)
To                Action      From
--                ------      ----
22                ALLOW IN    192.168.8.0/24
53                ALLOW IN    192.168.8.0/24
3000/tcp          ALLOW IN    192.168.8.0/24

techno-guerrilla $ ss -tlnp
LISTEN  100.64.0.1:8008   # Synapse, the VPN address only
LISTEN     0.0.0.0:53     # AdGuard DNS, LAN service
LISTEN     0.0.0.0:22     # SSH, firewalled to the LAN
# the Pi holds no public address; nothing is exposed to the internet
The full test is a teammate's phone. On a GrapheneOS phone, install the Tailscale APK via Obtainium pointed at Tailscale's GitHub releases. Module 00 uses the same method for apps not on Accrescent, no Google account required. In the Tailscale app, before logging in, open the menu and select Use an alternate server, enter your Headscale URL, then authenticate with a pre-auth key.32 Install Element the same way from its GitHub releases, sign in to your homeserver's 100.x address over the VPN, and send a message. A message delivered confirms the full chain: WireGuard tunnel up, Headscale coordinating, Synapse reachable on the VPN address, Element authenticating against it.
Optional reference · how networks work underneath
Build methodology and the optional full-rack upgrade are adapted from the M2 Community Node (CC BY-NC-SA 4.0).
Field exercise
Task: Audit your Module 01 node, operate it from off-site, repair an injected fault, and recover it after a reboot.
Condition: Given your operational Module 01 node (Synapse, AdGuard Home, and the Headscale tailnet), your GL.iNet router, your VPS, a hardened phone and laptop, an off-site location on cellular or other Wi-Fi, a second device or assistant, and about two hours. You work only against your own node, router, VPS, and home network.
Standard: Record a Baseline and an After score for each vector on the scorecard. The task is met when: the LAN scan shows only the intended ports; the internet shows no open ports at your home address and only ports 22, 80, and 443 on the VPS; no device on the LAN resolves around AdGuard; the services answer over the tailnet and nowhere else; the required fault is injected and repaired; and the node restores its services on its own after a reboot with the backup restore confirmed.
Download the field exercise worksheet (PDF)
The server built here carries the team's traffic over infrastructure you control. The pattern transfers to any self-hosted service: a hardened host, a default-deny firewall, and access only over the VPN. Enroll each new device by the same procedure, and verify from outside the network that nothing else answers.
Module test
Task: Complete the Module 01 test.
Condition: Given ten questions covering units one through eighteen, without reference to the module units or notes.
Standard: Answer at least eight of ten questions correctly. For each question missed, reread the unit named in the feedback and retake the test until the standard is met.
Glossary
- AdGuard Home
- A network-wide DNS filter that blocks ad and tracker domains for every device behind the router.
- apt
- The package manager on Raspberry Pi OS; installs and updates software (
sudo apt install). - boot order
- The order the Pi 5 firmware checks disks at startup. On many boards it checks the NVMe before the microSD, so a drive that already holds a system can take over the boot. Set with
rpi-eeprom-config. - Caddy
- A small web server placed in front of a service to handle HTTPS and fetch its certificate on its own. Here, in front of Headscale on the VPS.
- client
- A device that connects to a server to use its services, like your laptop or phone.
- cloud-init
- The system that configures the Pi on its first boot from the settings you wrote in the imager.
- container
- An isolated box that runs one service without disturbing the rest of the system. Run by Docker.
- default-deny
- A firewall policy that blocks every port until you explicitly open it.
- DHCP
- The router service that hands each device an address. A reservation pins one device to the same address every time, which a server needs.
- DNS
- The lookup that turns a name (
techno-guerrilla.local) into an IP address. - Docker
- Software that runs each service in its own container. Docker Compose defines and starts services from one file.
- Element
- The Matrix chat app the team uses, on the phone and the laptop.
- federation
- Matrix servers talking to other Matrix servers. Turned off here so the server stays private.
- firewall
- The gate that decides which ports anything outside can reach. Set with
ufw. - gateway
- The router, which sits between your network and the internet.
- GrapheneOS
- A hardened, de-Googled version of Android the team's phones run.
- headless
- Running a computer with no monitor or keyboard, reached over the network instead.
- Headscale
- The self-hosted coordinator for your WireGuard VPN. You run it, not a company.
- hostname
- A machine's name on the network (
techno-guerrilla), used astechno-guerrilla.local. - IP address
- The number that says where a device is on a network, like
192.168.8.152. - key pair
- The two halves of an SSH key: a private key that stays on your laptop, a public key on the Pi.
- LAN
- Your local network: the devices behind your own router.
- Let's Encrypt
- A free certificate authority. Caddy uses it to get the HTTPS certificate for your server's public name.
- LUKS
- Full-disk encryption that makes the disk unreadable if the SSD is removed.
- M.2 HAT
- The board that adds an NVMe SSD to the Pi 5, joined to the PCIe port by a ribbon cable. The official kit includes the drive and screws.
- Matrix
- The open protocol for the chat. Synapse is the server, Element is the app.
- microSD
- The card you install from. Slower than the SSD and not the long-term disk.
- NAT
- Network address translation. The router rewrites your devices' private addresses to its one public address on the way out, and drops inbound traffic that matches no request from inside.
- NVMe SSD
- The fast, durable disk the finished server runs from.
- PARTUUID
- The unique ID stamped on a disk partition. The boot loader picks which disk to start by this ID, so a clone must be given a new one or both disks look identical.
- port
- A numbered channel a service listens on (SSH on 22).
- pre-auth key
- A key made on the Headscale server that registers a headless device onto the VPN in one command, with no browser login. Reusable keys enroll more than one device.
- private address
- An address (
192.168.x,10.x,172.16–31) that works only inside your network and is unreachable from the internet. - public address
- A routable address reachable from anywhere. The router holds the single one for your network.
- Raspberry Pi 5
- The small, always-on computer that is the server.
- reverse proxy
- A server that takes connections from outside and passes them to a service behind it, usually adding HTTPS. Here, Caddy in front of Headscale.
- router
- The device that joins your network to the internet and hands out addresses.
- rpi-clone
- The tool that copies the running microSD system onto the NVMe SSD and rewrites the partition IDs so the SSD boots cleanly.
- server
- A computer kept on to run services other devices use. Here, the Pi.
- SSH
- Secure Shell: the encrypted command-line connection you run the server over.
- subnet
- One address neighborhood, like 192.168.8.x: the devices that can reach each other directly, without crossing a router.
- sudo
- Runs one command as the administrator (root).
- Synapse
- The Matrix homeserver software you run in Docker.
- Tailscale
- The open-source VPN client on each device. You point it at your own Headscale instead of a hosted account.
- techno-guerrilla.local
- The name your Pi answers to on your own network.
- ufw
- The Uncomplicated Firewall: the tool you set the firewall with.
- VLAN
- A virtual LAN: one physical router carved into separate networks that cannot see each other. The guest network in Unit 13 is one.
- VPN
- A private tunnel only your devices use, so the team reaches the server with nothing exposed to the internet.
- WireGuard
- The VPN protocol underneath: fast, built into the Linux kernel, key-based.
Sources
- Raspberry Pi 5: single-board computer (Broadcom BCM2712, up to 16GB), Model B form factor (~85×56 mm)
- Client–server model: clients request, servers provide
- Cloudflare Learning: What is a LAN?
- Default gateway: the router that forwards from the local network to other networks
- RFC 1918: Address Allocation for Private Internets (IANA private blocks 10/8, 172.16/12, 192.168/16; not publicly routable); with RFC 3022: Traditional IP Network Address Translator (address rewriting and the session state NAT keeps for outbound connections)
- RFC 6762: Multicast DNS (the
.localresolution Avahi provides on the LAN) - Arch Wiki: SSH keys (key authentication; the private key stays on the client and is never transmitted)
- SSH brute-force attacks: password-authenticated SSH on port 22 is under constant automated scanning and credential-list guessing (reconfirmed 2026-06-19)
- TechCrunch: ProtonMail logged a French activist's IP address after a Swiss order (2021)
- ufw: Uncomplicated Firewall (default-deny incoming; open only the ports you need)
- Raspberry Pi SSD Kit: bundles the M.2 HAT+ and a 256GB or 512GB NVMe SSD with the 16mm stacking header, spacers, and screws for the Raspberry Pi 5 (verified 2026-06-19)
- Raspberry Pi Active Cooler: clip-on heatsink and PWM-controlled fan for the Pi 5; holds peak performance under heavy load by preventing thermal throttling (verified 2026-06-19)
- Raspberry Pi 27W USB-C power supply: 5.1V/5A; the recommended Pi 5 supply for driving SSDs and other high-power peripherals (verified 2026-06-19)
- GL.iNet Slate AX (GL-AXT1800): Wi-Fi 6 (AX1800) travel router (verified 2026-06-19)
- Headscale: requirements: a server with a public IP address, served over HTTPS on port 443 (Let's Encrypt), with a domain name expected for the certificate. The build needs a small VPS and a domain (verified 2026-06-19)
- Microsoft Learn: OpenSSH for Windows overview: OpenSSH ships with Windows as a Feature on Demand; on Windows 10 (1809+) and Windows 11 the client is the built-in SSH tool, added under Settings → Optional features if it is not already enabled (so no PuTTY; verified 2026-06-19)
- Raspberry Pi Imager: the official tool for writing Raspberry Pi OS; the current release is the version 2 series, which writes the cloud-init first-boot customization (hostname, SSH key, wifi) that current Raspberry Pi OS reads on first boot (verified 2026-06-19)
- Raspberry Pi: getting started: you create your own username and password during imaging (no default
pi/raspberryaccount); the Wireless LAN country selection sets the wifi regulatory domain (verified 2026-06-19) - Raspberry Pi OS: updating: the official docs recommend
sudo apt updatethensudo apt full-upgraderather than plainupgrade, because Raspberry Pi OS changes package dependencies more often than Debian (verified 2026-06-19) - sshd_config(5): “for each keyword, the first obtained value will be used,” and
Included files are “processed in lexical order.” A lower-numbered drop-in in/etc/ssh/sshd_config.d/wins over a higher-numbered one (e.g.01-beats the cloud-init50-); verified 2026-06-19 - geerlingguy/rpi-clone: the maintained fork (the original was abandoned in 2020). It clones a booted disk and rewrites the new disk's PARTUUIDs so it boots cleanly; it is the fork to use on Raspberry Pi 5 and current Raspberry Pi OS, where the original sets a wrong boot path (verified 2026-06-19)
- microSD write endurance: flash cells take a limited number of program/erase cycles, and a small write can rewrite a whole block, so continuous server writes (logs, container state, databases) wear a card out far faster than light use; an NVMe SSD is built for sustained writes and is several times faster (verified 2026-06-19)
- GL.iNet: first-time setup: the router has no default admin password; on first login at
192.168.8.1you create your own (verified 2026-06-19) - How Tailscale works: devices connect by NAT traversal (STUN/ICE) with encrypted DERP relays as fallback, so “there is never a way for a DERP server to decrypt your traffic” and no public-facing inbound port is opened (verified 2026-06-19)
- Headscale: registration: a node registers non-interactively with a pre-auth key via
tailscale up --login-server <URL> --authkey <KEY>, the headless method (no browser login needed); verified 2026-06-19 - The Guardian: NSA collecting phone records of millions of Verizon customers daily (Greenwald, 2013), which published the FISC “Secondary Order” (issued 25 April 2013) compelling Verizon to hand over all call-detail records / telephony metadata on an ongoing daily basis, with no individual suspicion required
- Just Security: “We kill people based on metadata”: former NSA and CIA director Michael Hayden, debate at Johns Hopkins University, 2014 (video clip)
- Synapse configuration:
federationis the server-to-server API; a homeserver that serves it contacts other homeservers, so disabling federation means omitting thefederationresource from the listener (and an emptyfederation_domain_whitelist);bind_addressessets which address the listener answers on (verified 2026-06-19) - NSA's MORECOWBELL: Knell for DNS (Grothoff, Wachs, Ermert; disclosed via Le Monde, Jan 2015): covert NSA infrastructure that actively queries DNS servers thousands of times an hour, run from rented servers abroad so the activity is not traced to the US government, to map services and detect changes
- Mullvad: DNS servers and privacy: when connected to the VPN, all DNS requests are rerouted to the provider's own resolver rather than the ISP's. A VPN moves DNS visibility to the provider by default (verified 2026-06-19)
- AdGuard Home: Docker: official image
adguard/adguardhome; DNS on port 53, first-run setup on 3000, dashboard on 80/443, DNS-over-TLS on 853; persist/opt/adguardhome/workand/opt/adguardhome/conf(verified 2026-06-19) - Headscale: Android: install the official Tailscale client (APK via Obtainium from Tailscale's GitHub releases; GrapheneOS recommends against F-Droid per Module 00), then select Use an alternate server in the app menu and enter your Headscale URL; verified 2026-07-16
- Headscale: reverse proxy: “The reverse proxy must be configured to support WebSockets… The value for the
Upgradeheader istailscale-control-protocol… The POST method is used to upgrade the WebSocket connection… Running Headscale behind a Cloudflare Proxy or Cloudflare Tunnel is not supported and will not work.” Corroborated by cloudflared issues #883/#990 and reproduced on the bench (POST /ts2021 → HTTP 500, log “no upgrade header in TS2021 request”); verified 2026-06-23 - RFC 1034: Domain Names: Concepts and Facilities (the DNS maps domain names to resources such as IP addresses)