Breadboard
A solderless breadboard is a grid of holes with metal clips hidden beneath it. The clips make the connections, so a circuit goes together in minutes and comes apart just as easily. Work the tabs in order: study the anatomy, click holes to see what each one connects to, learn the rules for building, and finish with the drill: five placement problems, answered by clicking the board.
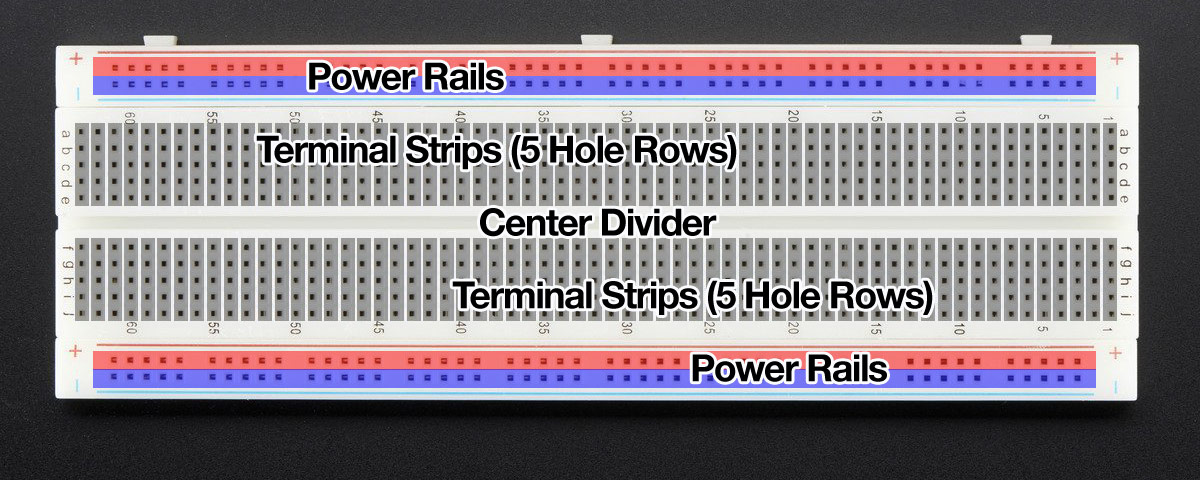
Two power rails run the length of each edge (red for plus, blue for minus). The main field is terminal strips: short rows of five holes wired together. A center divider splits the board so a chip can straddle it with a leg on each side.
Nothing selected
Every highlighted hole is wired to the one you clicked. They are a single connection: one node of your circuit.

- Give each leg its own strip. Put both legs of a part in the same five-hole strip and you have shorted it out.
- Jumper between strips. A jumper wire carries a signal from one terminal strip to another. Use stiff jumper wires; flexible wire will not seat.
- Power on the rails. Bring the supply to the plus and minus rails, then jump from a rail into the strips that need it.
- Chips straddle the divider. Sit an IC across the center gap so each leg lands on its own strip, never shorted to the leg opposite.
Anatomy diagram and build photo from the Adafruit Breadboards for Beginners guide, used with permission.